The gear is currently being sorted, the maps have been studied, and the countdown is officially on. This summer, Oliver and I are heading to the northern tip of Vancouver Island to tackle one of Canada’s most rugged coastal wilderness experiences: the North Coast Trail.
We have locked in our Cape Scott water taxi transport and purchased our BC Parks backcountry permits. Everything is official, and we are ready to head to the trail.
What Makes the North Coast Trail Unique?
For those unfamiliar with this stretch of British Columbia, the North Coast Trail (NCT) is often considered the wilder, more remote cousin of the West Coast Trail and can include an extension of Cape Scott Provincial Park, which we’re also doing.
Here is a quick look at what we are stepping into:
The Distance: The trail spans 43.1 kilometers (about 27 miles) from Shushartie Bay, reachable by water taxi, to Cape Scott junction, but that is just the NCT portion. On our way to the Cape Scott trailhead parking lot where a shuttle will pick us up, we will tack on the Cape Scott Trail, a day trip to the lighthouse, and a stay at San Josef Bay camp, bringing our total trek to around 80 kilometers.
The Terrain: This isn’t a casual walk on the beach. The NCT is notorious for its challenging terrain. We will be navigating tidal crossings, climbing steep headlands, using cable cars, scrambling over slippery piles of driftwood, and wading through the island’s legendary deep mud.
True Wilderness: The area is incredibly remote. There are no towns and cell service is nonexistent. It is prime habitat for coastal wildlife, meaning we will be sharing the coastline with black bears and wolvess.
Follow the Journey
Because this trek promises incredible views and plenty of challenges, we are bringing you along for the ride. As always, we will be documenting the entire experience to share with you.
Once we emerge from the trees and get back to civilization, you can look forward to:
Detailed Trip Reports: Breakdowns of our daily mileage, campsite conditions, and trail notes.
Trail Videos: Video documentation of the trek, from the water taxi drop-off to the muddy realities of the inland sections.
We are incredibly excited to challenge ourselves on this stunning slice of Vancouver Island.
Stay tuned for updates, and we will see you on the trail!
There is a specific kind of magic in the “halfway” point. Whether it is reaching a literal summit or, in this case, hitting a major financial marker, the view from the middle offers a clear look at how far I have come and exactly what is left to conquer.
I am thrilled to share that I have officially hit the $5,000 mark in my dedicated savings for the Appalachian Trail. Having$5,000 tucked away for gear, food, and resupply stays makes the dream feel tangible. However, as any hiker knows, you don’t just plan for the climb; you have to plan for the descent and everything in between.
Beyond the Backpack: Staying Home-Ready
While the $10,000 trip budget is strictly for the trail itself, the “real world” doesn’t pause when I step onto the white blazes. To make this five-month journey possible, I am simultaneously building a separate “Home Fund.”
The goal is to fully cover five months of household expenses. This ensures that while I am navigating the trail, the mortgage is paid, the lights stay on, and my family remains supported without any financial strain. It is a dual-track savings marathon, but seeing the trip fund hit its midpoint gives me the confidence that this second obstacle is just as manageable.
Fueling the Dream Through the Page
A huge part of this momentum comes from my writing. It is a unique joy to know that every book sold is quite literally a step toward the trail. As I dive into the final stages of my next release, the progress feels even more meaningful.
The characters in this upcoming book are finding their way through their own challenges, just as I am navigating the logistics of this two-year plan. I am currently deep in the editing process, and the excitement of bringing this new story to you is matched only by the excitement of seeing my “Trail Savings” account grow.
While the hike is still a way off, the preparation isn’t just happening in my bank account. I have started a dedicated fitness routine now to ensure I hit the trail strong and, more importantly, stay injury-free.
Success on a thru-hike often comes down to how well your body can handle the repetitive stress of the miles. I have been incorporating specific workouts, including some great virtual reality sessions in scenic locations, to keep my cardio up and my movements fluid. Building this foundation early means that when I finally shoulder that full pack, my body will be ready for the challenge.
The Two-Year Countdowns
I am officially one year into my two-year plan. The discipline of the past twelve months has proven that the $10,000 trip goal is within reach. It is a lot of spreadsheets and even more early morning writing sessions, but every bit of effort is an investment in the 2,000+ miles ahead.
This article was first published on The Trek on March 16, 2025.
Oliver’s Journey to the Arizona Trail
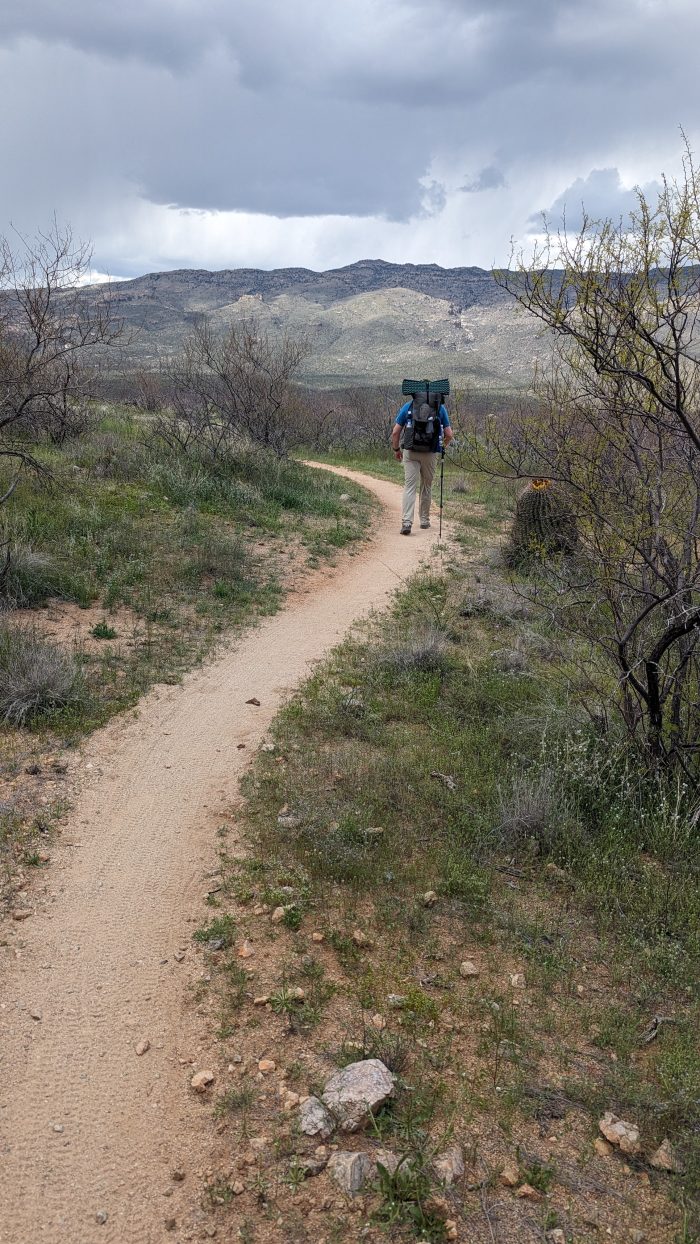
In case you’re just tuning in, my name is Oliver and I am a Canadian Armed Forces chaplain. I am going to leave to hike the Arizona Trail in 9 days. A lot of conventional wisdom out there seems to suggest that prepping isn’t that important – that you don’t get your “trail legs” until a week or two in anyway, and the only way to truly prepare your body for thru-hiking is by thru hiking. That’s great if you’re in your 20s to 30s and you’re a handful of pounds from a healthy weight. It’s another if you have spent the last 30 years since high school raising children and riding a desk.
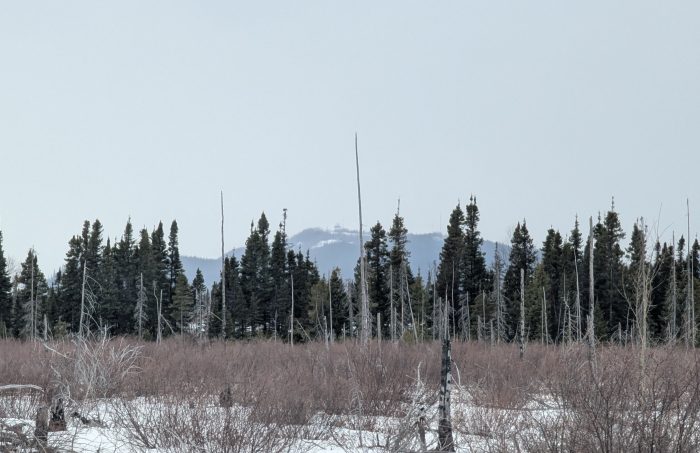
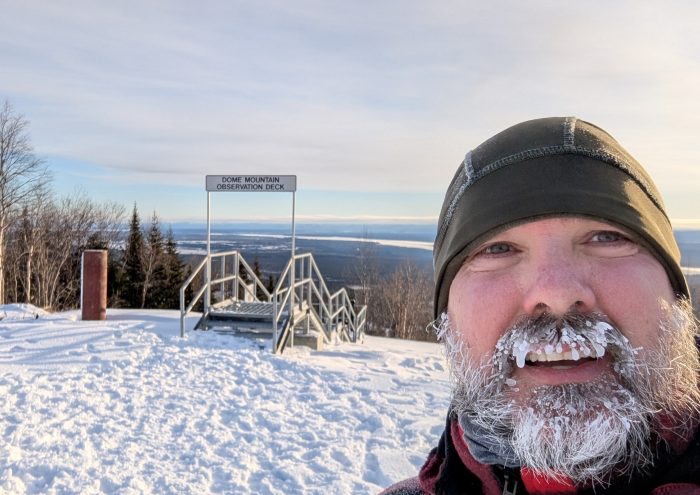
There’s Dome Mountain off in the distance…
Overcoming Health and Fitness Challenges
Of course, my story includes a few more challenges than that – last year I had a cardiac event which left me in a hospital for 3 weeks straight, and health-related anxiety that had me questioning whether my heart was going to stop every time I started breathing hard. Since then I have been working hard to trust my body again, slowly building my capacity up to be ready to hike on March 26.
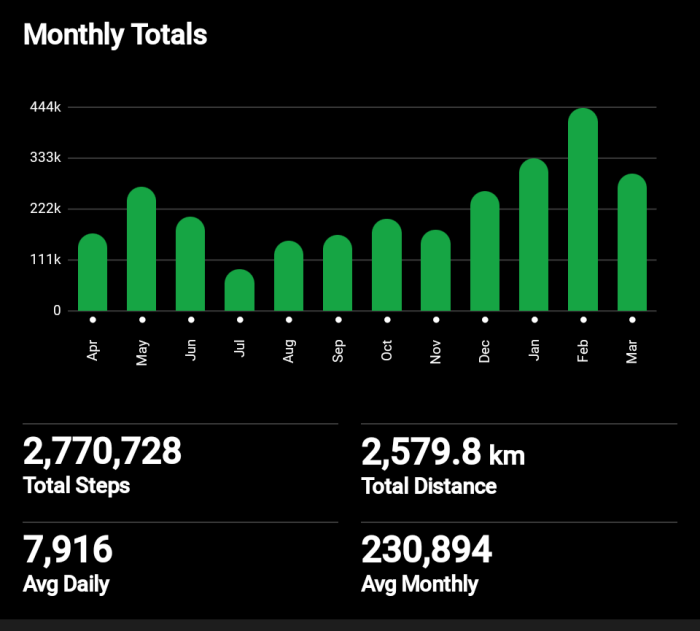
My plan, as I outlined earlier, was to work on averaging 10 thousand steps per day in January, 15 thousand in February, and 20 thousand in March. I hit my goal in January, and in February. Here we are halfway through March, and I thought I would give one more update. I plan to go into rest and recover mode by next Saturday, and give myself 3-4 days before hitting the trail to let blisters and chafing heal up, before tackling Miller Peak day 1.
The event was the end of June. I am really proud of the trendline ever since and the total steps I have put in the last few months – some of the biggest non-hiking months of my life.
Dome Mountain Training and Loaded-Pack Hikes
The first week of March I got into a routine of pushing hard for 25 thousand steps, then the next day slowing down to 15 thousand. This worked well for the first week, then week 2 I tried to include more 25 thousand step days, culminating in Saturday, where I have made it a habit to climb Dome Mountain (the only height of land around here with elevation gain and a trail that works in most weather).
In January I was only doing the mountain itself, 9km (6 miles). In February I started walking up with a light daypack, some water and snacks, and beginning my journey at the start of a 2 mile stretch of road to the base, making the total distance 13.5km (8 miles) up and back to the car. In March I strapped on my loaded Durstongear Kakwa 55 and carried that up the 13.5, then yesterday I took it even farther: I hiked from my house up the mountain and back for a total of 22km (13.6 miles)!
I was in rough shape last night, pretty tapped out but I think I was worse off than I could have been because I planned to have a Mountain House meal at the summit for lunch… but realized that since my pack was loaded with trip gear the stove didn’t have a gas canister in it (because I have to fly with it, I didn’t have one packed).
So a handful of cookies was all the calories I was fuelling with up and back, and I think that was a mistake. But doing that kind of distance with load was a huge confidence builder because that’s the distance I expect to do on day 1 up close to 9500 feet on Miller Peak (albeit with a lot more elevation gain… but on trail I’ll have all day to get it done, whereas yesterday I did the whole distance in 5 hours!)
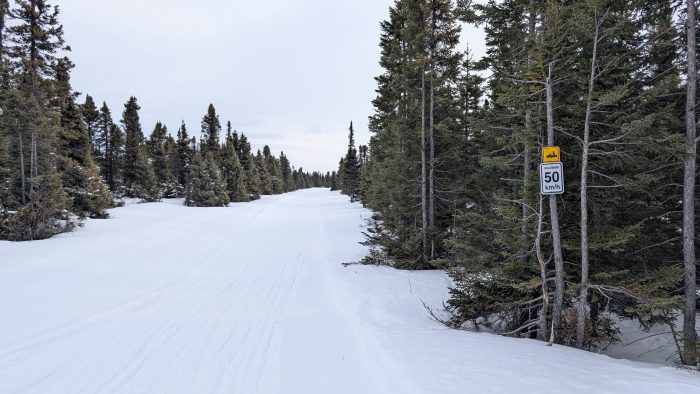
Don’t worry, I didn’t exceed the speed limit of the snowmobile trail on foot!
Final Preparations Before Hitting the Trail
All in all, I am feeling very good about the prep I have managed to get in. I feel confident in my body for this trip, barring unforeseen accidents. All that remains now it to finish out this week, plan out my first week’s meals and snacks, pack them up, and wait for my flight!
This last week of training will be still aiming for 20 thousand steps per day, but I won’t be pushing for more. And I may wind up doing it in the gym on the treadmill as we have two warmup days forecast, which may turn the roads and trails into ice sheets. That isn’t the worst problem to have though… I have some Icebug shoes that can deal with traction. But with two rapid warmups it is also likely to be very windy, and windchill is miserable.
In any case, my next post will probably be on the 26th about my journey to the trail! See you in Arizona!
Watch the final preparation video in Oliver’s Arizona Trail series:
This article was first published on The Trek on February 14, 2025.
Why a 50-Year-Old Chaplain Chose the Arizona Trail
So what makes a 50 year old military chaplain want to burn a year’s worth of leave on one trail experience? Why leave behind wife and family, work and responsibilities to take on a long trail? I am sure there are people in my life questioning my sanity at just wanting to walk for 800 miles in a go, but there are probably some who will be asking the deeper questions. It is natural to wonder, and also very common to judge that thru hikers are shirking responsibilities, ignoring those who need them, being selfish, having a mid-life crisis (or quarter-life crisis, depending on age), there’s a million assumptions that could be made. So I will attempt an explanation.
Where to start. I am going to begin with 2022. It probably wasn’t the beginning. There are neither beginnings nor endings on the wheel of time… but it was a beginning. After three years of COVID and the challenges that go along with that, Canada was finally beginning to return to normal. And just like that, real estate prices took off. In 2022 we were slated to be posted to a new base, and we realized that most of the places I could be sent would be to inflated housing markets, which if a market correction happened, would destroy a lot of equity for us. The only alternative was to take a posting to an isolated base, where we could live in base provided housing. Goose Bay, NL was available, so I put my name forward for it and was accepted.
From Isolation and Burnout to Rediscovery
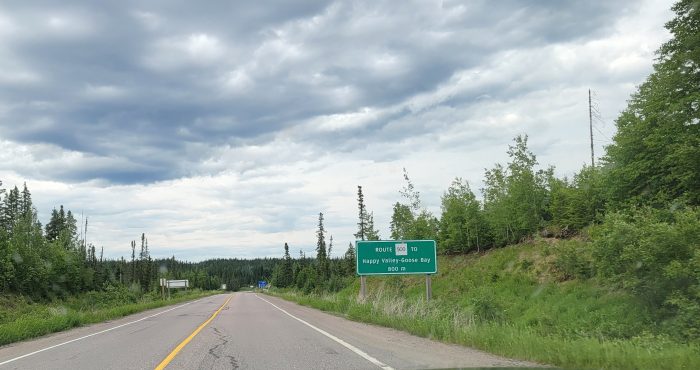
July 2022: rolling up on a more than 5000km road move with the family
The downside to such an isolated station was that I would be a one of one, and far from immediate support if things go sideways. As I mentioned, COVID had affected many, and I was feeling like I needed more human connection and support, but thought I could “tough out” three years there, especially if the community was as close-knit as I was led to believe. And certainly, that wasn’t a lie, but I probably underestimated the relational barrier that my trade presents. People make assumptions, sometimes subconsciously, and it leads to distance.
By the dead of winter, 2024, I was beginning to notice that the isolation was affecting me. I was starting to see signs in me that I had been trained to watch for in others. I was thinking possibly burnout, but my wife and I thought that an early spring hiking trip together might give me some sun, some vitamin D, and R&R to get my mind back in the game. We decided on a section hike of the AZT.
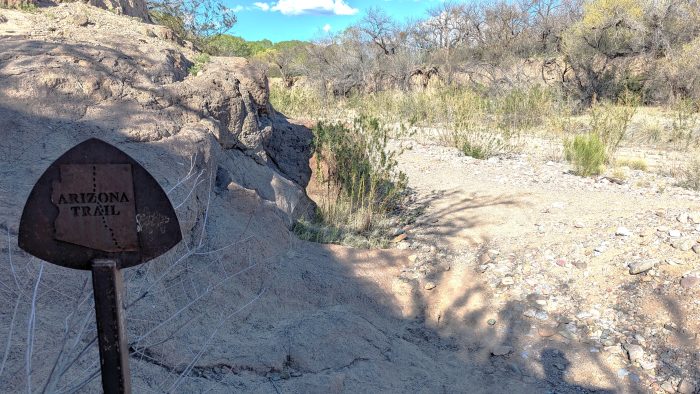
Down in a wash north of the Gabe Zimmerman Trailhead
It was a very good time from my perspective. I did come back feeling better… for a couple of weeks. But then the symptoms were back. By May I decided to throw a flag on the play as it were, and alert my supervisor that I needed some support. I was put on sick leave, but I found it very difficult to separate myself from the job when you’re the only one there doing your job, and feelings of guilt and responsibility for people continued to weigh me down.
Health Scare and the Need to Rebuild
I threw myself into running training, which I usually do in the early spring because it’s really easy to slack off in the silly season of October to December. I pushed myself perhaps too hard one day in early June, doing some very intense sprints. Did I mention I was 49? My Garmin Instinct 2 watch told me my heart rate was 200. 200? That can’t be right. I watched it as I finished up my training program and it stayed in that range for 15 minutes before normalizing. I thought, a minute or two it could just be a glitch, but that long a period, I should probably check in with my doctor.
I popped by the base medical, and saw my doctor, who referred me to the hospital for a blood test. The hospital took my blood, and then in a few minutes returned wanting to put me on monitors, and admitted me for more tests.
I had never experienced anything like this before. The sudden concern, the tests, the medications… they all had me doubting my health for the first time in my life. That evening one of the medications dropped my heart rate abnormally low, which I now believe set off my first panic attack in my life. The doctor took me off that med, but by the next day they told me that I was showing signs of having experienced a cardiac event, and they wanted me to stay on bedrest until they could move me to the provincial capital, a 2 hour plane flight away. So began a wait of over 3 weeks in the hospital, wondering if I was dying every day.
By early July they finally found me a spot on a medivac flight (I had to wait because I was stable, compared to many other cardiac patients they saw during that time). In St. John’s they gave me a dye test and a heart ultrasound, until finally concluding that no, I did not have a heart attack. But I did have a little plaque, and they kept me on Statins to resolve that.
So I returned home having been told no, I am not dying, but basically in a state where the burnout I had been feeling had now been piled on by a large dose of health anxiety. I needed to begin to rebuild myself, my confidence, my resilience, and find a new way of living that would allow me to return to the work that I loved, helping people and making a difference.
The Physical, Mental, and Spiritual Benefits of Thru-Hiking
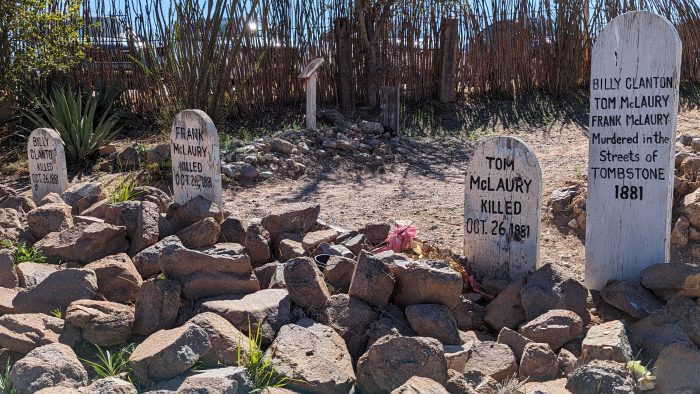
These guys didn’t thru-hike. That, and they threatened Wyatt Earp and his brothers. Neither was a healthy decision.
Over the years as my passion for hiking had grown, I had run across studies of veterans with PTSD and other disorders, experiencing wilderness adventures and even through hiking and finding themselves making real progress. For me, I believe that this thru hike can do a lot for me in terms of rebuilding myself. What will it do?
I won’t have to be responsible for anyone but myself. Eat, hike, sleep. The daily rhythm will provide stability and rest from the variable environment I have been in.
I don’t have to chaplain anyone. I don’t have to parent anyone (I have teenage and young adult sons at home). I can lay those burdens and stressors down for a time. To be fair, and I have been told by several peers, I need to be able to let go of my job, and be okay with it being someone else’s responsibility. I can make excuses about why that’s hard, but I can’t disagree.
Physical Health. Using my body all day every day, I fully expect to lose some weight.
Trust again in my Body. I also expect that overcoming the challenges of the trail will help restore my confidence in my own health, that I am not dying, that I am not fragile. It is easy to tell oneself these things, it is another to believe it deep inside after a scare like I had.
Reconnection to the Spirit. As a chaplain, my faith is not just a part of me. My sense of hope, my sense of purpose, my recognition of the parts of the person that are often overlooked or neglected by others are key to doing my job well. These things are meant to be shared, especially for people who are doing a job that deals with life and death. I have found I have been so busy serving others that I have let my own connection shallow out. I need to spend time with God – undistracted time. I have always found that easier in nature; in creation.
Trail Connections. My hope is that I do not spend the whole time alone. My hope is that I will meet fellow travellers along the trail and form new relationships – relationships that do not expect anything from me, that do not see me as “other”. And from these relationships perhaps I will carry some into the future to help sustain me after I return to work and life.
So that’s my why. A little long-winded perhaps, but I actually skipped a lot! Save some for camp chat in the evenings, I hope!
Watch the first video in Oliver’s Arizona Trail Series on YouTube:
This article was first published on The Trek on February 6, 2025 under the title Solo AZT Loadout – Kinda UL.
My Arizona Trail Gear List for 2025
Everyone loves gear lists, don’t they? I am not sure why, because it seems to me what’s in your pack is very much in the same vein as “Hike Your Own Hike” – your reasons for hiking, for speed, for zeroes, and for carrying next to nothing or the kitchen sink are your own, and probably unique to you.
But maybe that is what makes gearlists so fascinating. Because they are like a fingerprint. They identify you, where you’ve been, how you think, and probably more.
So, with that preamble, I present to you another gearlist (clicky linky for Lighterpack) running 15.9lbs Baseweight. This gearlist is by no means generic. Let me give you a run down of the big flavours.
What Makes My Arizona Trail Gear List Unique
It’s a Canadian’s Arizona Trail gear list. Despite us being America’s next door neighbour, our dollar is weaker, and whatever kind of “free trade” deal is currently in place does not touch duties and costs of cross-border shopping.
It’s a 50 year old‘s gearlist. I got me some pills to take, and a set of reading glasses, and probably some other bits and bobs that a strapping 20 year old wouldn’t even think to take.
It’s a gearlist that still has some throwback items I have had from before I ever heard of Ultralight. There’s probably a story for each of them… catch me in camp some evening and I’ll tell you a couple.
It’s a gearlist to hike the AZT. There’s a lot of stuff I am leaving at home, because it just isn’t needed. Two of them are bug spray and bear spray, just as examples. And there’s some stuff that I would only bring to the desert – the foam mattress, the stargazer kit and the groundsheet to name a few.
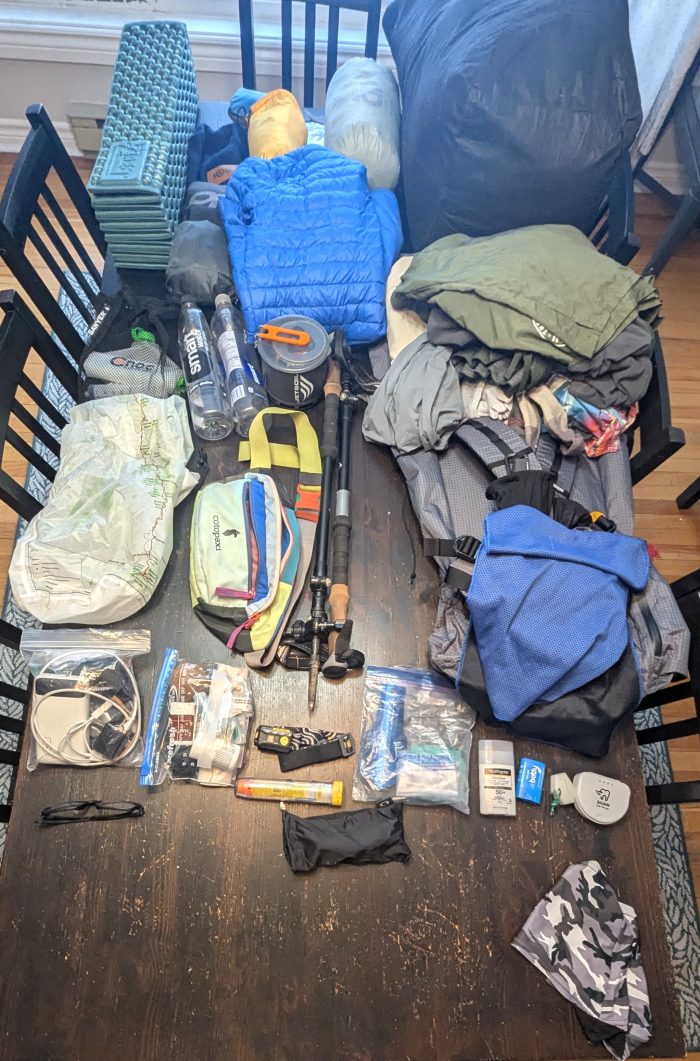
Arizona Trail gear for 2025.
The Big Four and Core Setup
Here’s a closer look at the core setup of my Arizona Trail gear list, including my shelter, sleep system, and pack. My shelter is the Durston Drop XMid 1P. That’s right, the OG. I picked it up back when I first began to hear of ultralight, and I cast my eyes around for a trekking pole tent that would not break the bank. Sadly, next to none of them were available in Canada. But at least this one was designed by a Canadian, so I ate the import duties and received my prize. Honestly, I haven’t had it out much – I picked up a 2P a year later when my wife wanted to do a section of the Great Divide Trail with me. Had to snag it second hand, they were rare as hen’s teeth at that time.
I have the stargazer kit and the new groundsheet, mainly because desert nights could be both prickly and stunning. Worth the weight penalty.
My sleep system is going to include my oldest foam mattress, an old Thermarest Z-Lite from I think about 2003. That will go in the tent on the bottom, not necessarily for extra warmth, but to protect my air mattress. On top of that will be my Nemo Tensor insulated, which is plenty of R-Value for me. I’ve had it out in sub-freezing temps and been fine on it. I have a Thermarest mattress sheet as well – a small weight penalty, but I can wash it with my laundry and it will take my sweat and body oils. I just upgraded my pillow from a Sea-to-Summit Aeros to the Aeros UL Deluxe. I found the smaller pillow to be awkward to manage, hoping the larger one works better. Lastly, I have a hand-stitched 20 degree quilt from Little Shop of Hammocks, a cottage company in Saskatchewan. I’ve actually met the owner (and craftsperson) who made it while on trail and it’s excellent work.
My pack, you can probably guess is a DurstonGear Kakwa 55. I have a Drop 40 and a Kakwa 40 as well, but I find that when I use the Kakwa 40 for extended trips, I max it out. I mean, it’s stuffed. So I decided to grab a 55 so I don’t have to spend as much time carefully organizing and compressing everything, and so that I can fit a bearcan if I have to. Not that I’m bringing one this time.
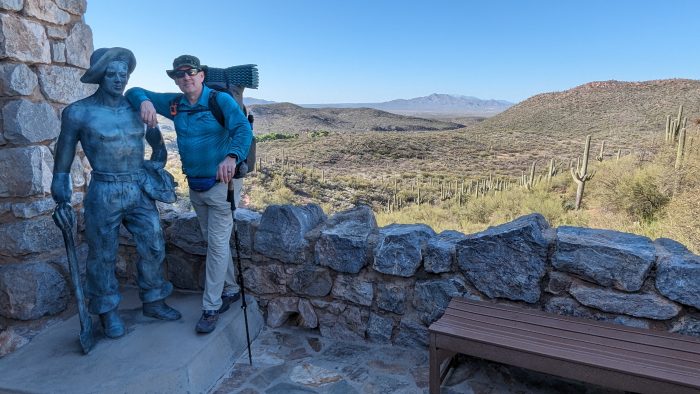
Hanging out with a statue at Colossal Caves in 2024.
Food, Water, and Clothing for the Desert
When planning my Arizona Trail gear list, I paid close attention to food, water, and clothing to survive desert conditions. I am still extremely weirded out at how nonchalant hikers are on the AZT. People eat in their tents, sleep with their food bags, and never worry about rodents or bears. It’s crazy. But, I am not going to overpack so I am just bringing a drysack with an Opsak inside for food (I think I’m going to eat outside my tent anyway, and hopefully there will be no food scents inside), and then a Sawyer Squeeze for water. I’ve used and been happy with the Katadyn BeFree on many trips, but I’ve been convinced that the rugged Squeeze will serve me better with the sketchy water sources on this trip. I also picked up a CNOC 2L bladder to complement my Smartwater bottles, which will give me a carrying capacity of 4L on the trail. I hope that’s sufficient.
For a stove, I prefer the Jetboil Stash. I have used a BRS stove, and must concede it is lighter, but the Jetboil just outperforms it in so many ways, I won’t be going back unless I am desperate. The Stash boils faster, uses less fuel, won’t overheat and collapse (Which I have literally seen a BRS do in the wild), and all for maybe a 15 gram weight penalty.
My Lighterpack only includes the clothes that will be in my pack, not the stuff I will be wearing. So, add a set of Outdoor Research Ferrosi shorts, an OR sun hoodie, a nylon belt, my Saucony trail runners (got them for a steal on clearance last year, and they are decent performers though I would prefer Hoka Speedgoats, and will probably buy them if I need a new pair on trail), a set of Injinji sock liners, a pair of Darn Tough Micro Crews, my Dirty Girl gaiters, and my Garmin Instinct 2 Solar watch. Oh, and a ball cap.
In my pack I’ll have a light half zip fleece which is my go-to midlayer 90% of the time which gets worn first for light rain, chilly mornings, chilly evenings, and any other time I need more than thin technical fabric. I’ll also have a Decathlon Forclaz hooded puffy for REALLY cold mornings and evenings (anything within spitting distance of freezing), a pair of OR Ferrosi pants, some short shorts for when I am too hot to think or want to go for a swim in Hutch’s Pool, a merino t-shirt for a backup top and extra underwear and socks. I’ll have a pair of very light merino gloves if I am desperate, but my hands usually run pretty hot.
I’m bringing raingear – OR Helium top and bottom just in case. They are very lightweight and not very durable, but if something sustained hits – especially wind and rain at the same time, I think I’ll be glad to have them. Better safe than sorry.
Breaking trail… an easy job on this segment! I believe this was heading into Saguaro National Park.
Electronics and Other Essentials
Finally, my Arizona Trail gear list includes electronics and a few other essentials to make desert hiking safer and more comfortable. I’ll be packing a GroPro 12, and hope to put together some trail videos. I will have a couple of attachments along with, including a headmount and a polemount. Packing a 20mAh Battery pack, and it should last as long as I need it to as I think the longest pull away from a potential recharge is 6 days. I have an extra battery for the GoPro too, so if I can avoid the need to top that up and just use the battery pack for my phone, that will be awesome.
Just a few other notables – I use a stick sunscreen – I find it less messy and chance of spilling. Got a Jereko Gear Stake/Spade driver from GearTrade in Calgary – it was handy on my last trip for driving stakes in the hard ground without resorting to smashing the stakes with rocks. Only caution – it is plastic, so if it is not used carefully it will break. I managed to get my hands on a teardrop thermometer – I like knowing how cold it really is in the microclimate. I have this handy cooling towel I got a couple of years ago at a fitness event on base – it is so light and quick drying I love bringing it. It can serve as a drying towel for a swim, a drying towel for condensation on the inside of the tent, and of course something to cool the neck on a hot day. Also packing a cork ball – I wanted something to massage feet and limbs with in case I inflame some tendons or something. You never know right?
This content was first published on The Trek on January 31, 2025.
Meet Oliver: A Canadian Hiker Taking on the Arizona Trail
Hello, TheTrek-Verse! I thought I would introduce myself to you tonight, and give you a little hint of what is to come from my keyboard(s) as I step off on this adventure of Thru-Hiking. My name’s Oliver (still waiting for a trail name), and I’m a 50 year old father, whose day job is in the Canadian Armed Forces. If that doesn’t put you off, read on!
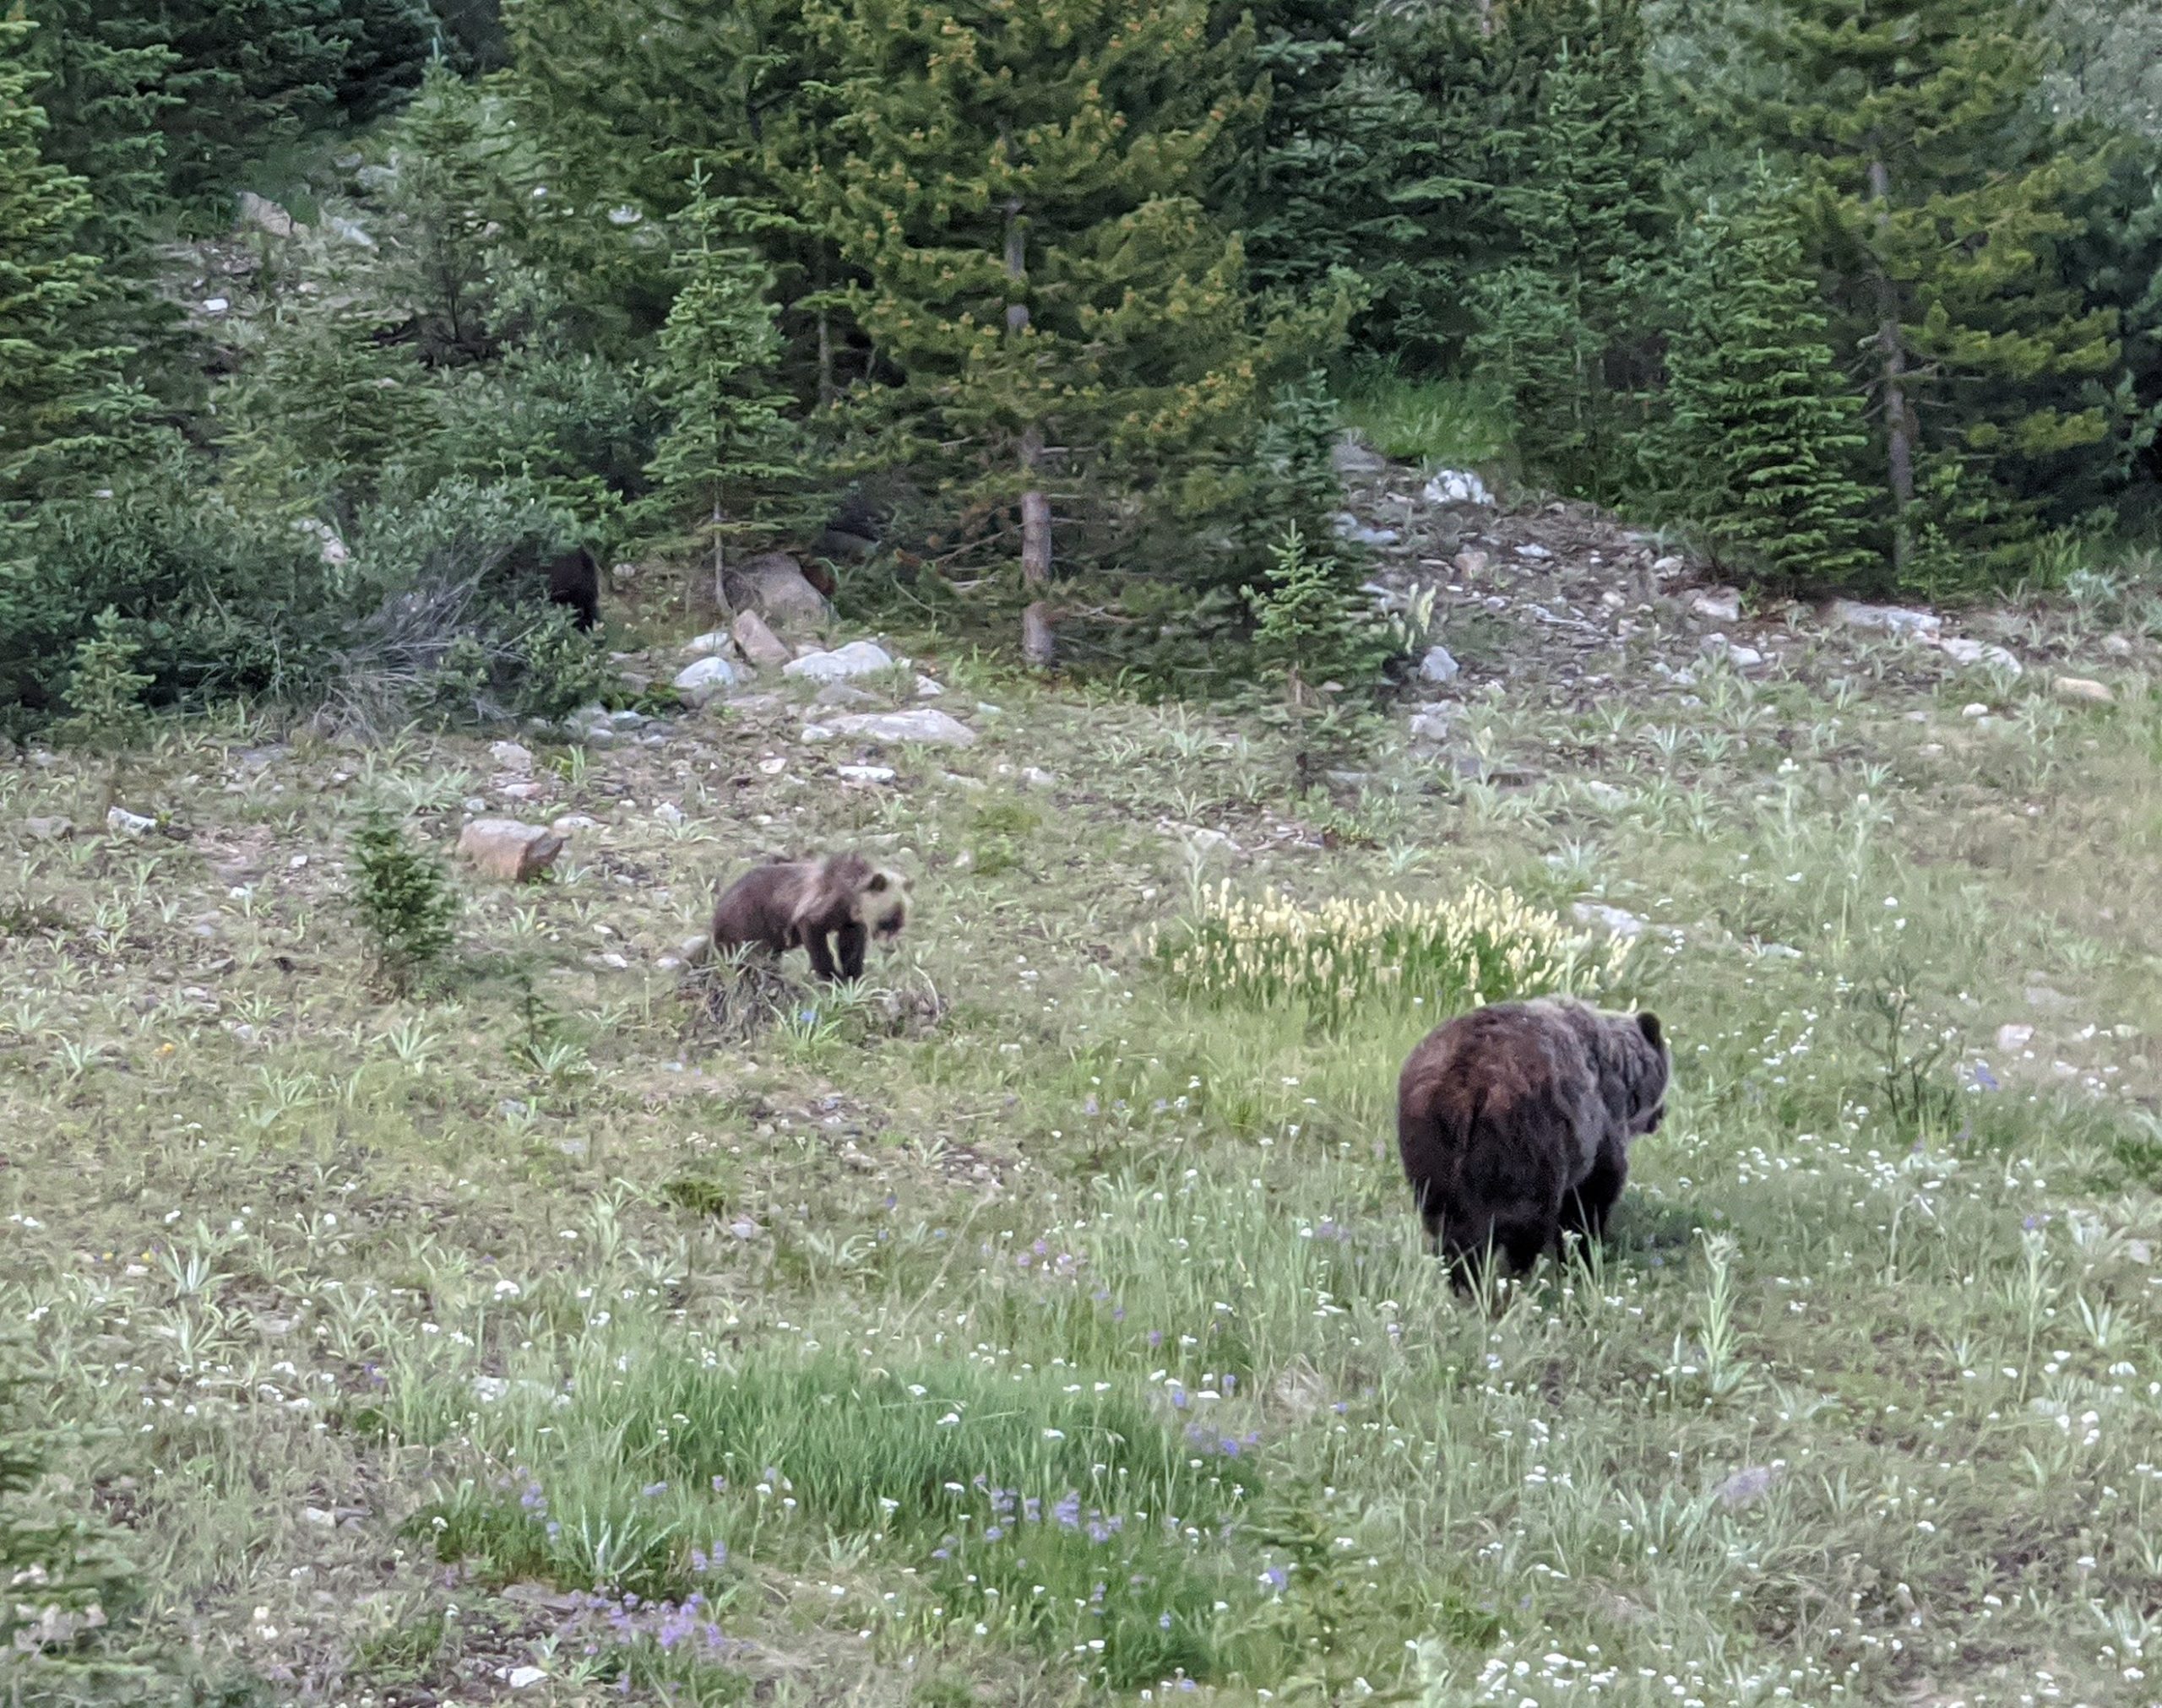
It might be a little disingenuous to call it my first thru-hike, but the ones I have completed up to this point have been shorter – completable in a week or two. My longest hike to date was Section C of the Great Divide Trail, coming in around 200 kilometres or about 120 miles. So, taking on all of the Arizona Trail (800 miles) is a very exciting challenge.
Two grizzlies hanging out about 2km from the northern terminus of Section B on the GDT, summer of 2020.
From Bear Country to the Desert
Coming from Canada, hiking the desert is a refreshing change of pace. Hiking in Canada is primarily a summer activity, and most of the best hiking is in Bear Country, and when I say bears I mean BEARS. So coming south of the border to a place where bears and mountain lions are such a rarity that nobody even packs bear spray is definitely refreshing.
Not that there aren’t dangers in Arizona. Diamondbacks are no joke, and I kind of wish it were possible to pack antivenom because I hear search and rescue is very expensive in America. (CORRECTION: a reader advised me that Arizona has volunteer search and rescue teams that do not charge for service, so that’s a good thing! For the record I would not hesitate to call for aid regardless, I value my life and so does my family!)
And the desert landscape itself is a hazard. Planning your day around water sources, making sure you are protected from the big yellow ball of hate in the sky, these are definitely new challenges. But in the long tradition of Canadian Snowbirds, I am going to come south and enjoy the desert heat while my home eagerly awaits spring, which should arrive around the time I get off trail in May.
Why I’m Hiking the Arizona Trail
Why thru hike? Why now? My why has a lot to it, so watch for another post on my “Why” in a few weeks, but for now the busyness and disconnectedness of modern western civilization is soul crushing in my opinion. My job involves caring for people, and that costs mental and emotional energy. All of these things have added up to the point where I need to get away from everything, reconnect with nature, reconnect with my soul, and reconnect with God. Where better to do that than the desert wilderness? Mystics have a very ancient tradition of retreating to the wilderness for just such aims, from the 2nd century Desert Fathers to the monasteries of the Middle Ages.
Up until this point I have preferred hiking with others, both for safety reasons and because I just like people. But this time, this hike is not just about the miles I walk and the things I see, but also an internal journey to wellness. I need to be with me and find my strength not in other people, but deep inside. Hence, this journey.
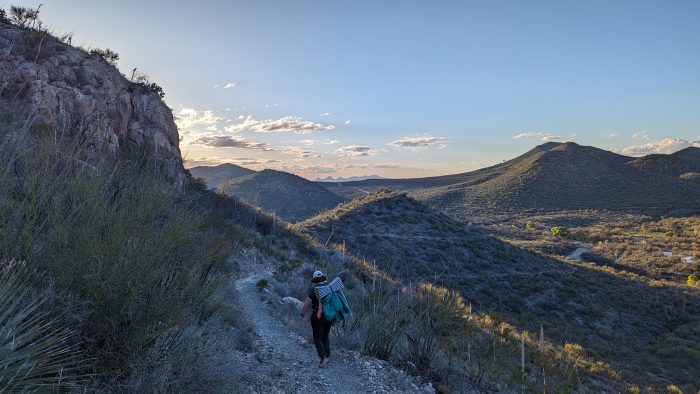
My wife, Cheryl, South of Colossal Cave, March 2024 AZT Section Hike
A Taste of the Arizona Trail
I got a taste of the trail, both the good and the bad last spring with my wife. We hiked a section of trail from Vail (outside of Tucson) to about 11 miles north of Oracle. Unfortunately, at that point we ran into a nasty cloudburst that ripped the peg lines off two corners of our tent at 4am. After we retreated to the city to do repairs, we decided to just enjoy the state for the remainder of our two weeks. However, it did not leave my mind… and when the opportunity presented itself again for this year, It was my #1 choice. Unfinished business.
Looking Ahead to the Full Thru-Hike
I am looking forward to meeting people out on the trail, catching up again with some wonderful trail angels we met last spring, and seeing the parts of the state north of Phoenix. I am also looking forward to seeing what my body can really do, whether I can really crank the miles after I get my trail legs, and experience true “hiker hunger” where American size plates of food still aren’t enough! I am excited to get a “trail name” but most of all, I am looking forward to how the trail shapes me, and that I will be refreshed and ready for the next season. I hope you’ll follow along with my blog posts and my vlogs on Youtube! (Untaken Trails)
Stay tuned for a few more posts before my start date (March 26). I plan to write more on “my why” and my health journey in 2024, as well as some posts on how I am preparing for a thru-hike while living in the frozen hinterlands of Labrador. Who knows what else I’ll start talking about! See you soon!
This article was first published on The Trek on February 2, 2025.
Getting Back Into Shape Before the Arizona Trail
It is super true what they say about how people my age feel like they are 20 inside… until they do something physical with a 20 year old… then they KNOW they are no longer 20! That’s definitely the thru-hiker world! Lots of 20 somethings on the trail, mountain goating, hiking into the night, up at the crack of dawn, and drinking their faces off in every trail town. I won’t be one of them.
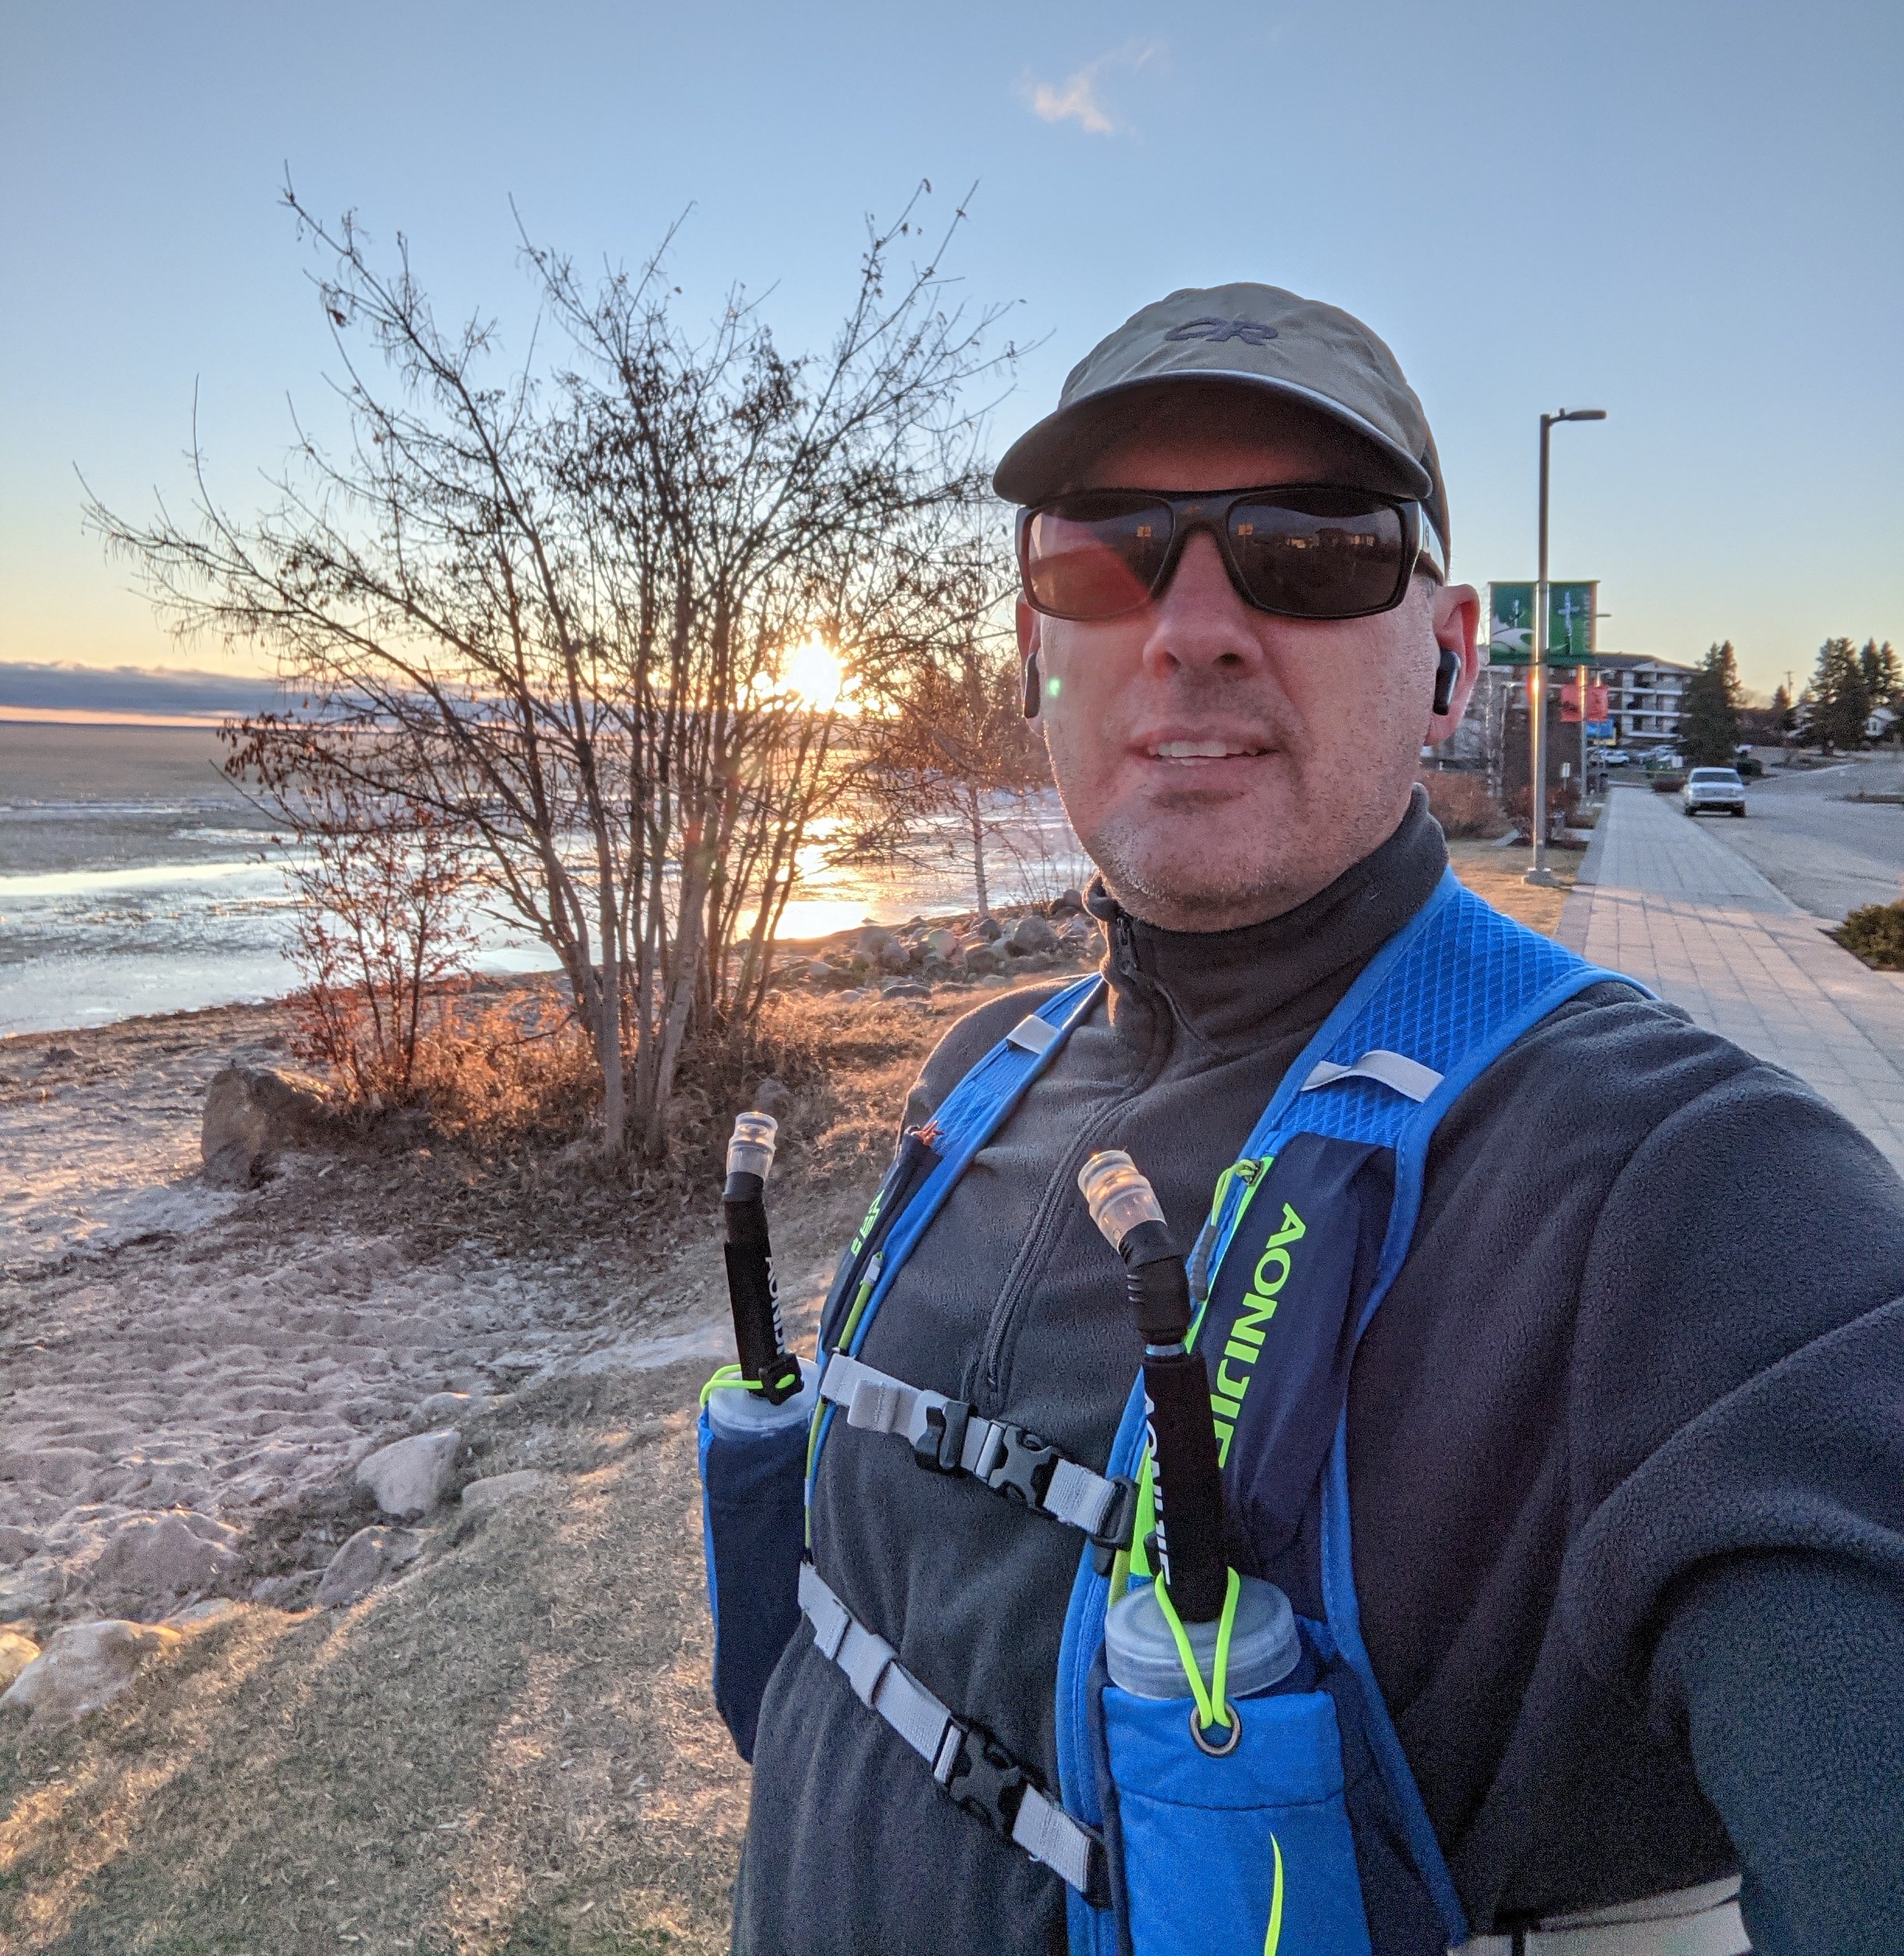
Dawn half marathon training run by the shores of Cold Lake, April 2021
Staying in shape has been a challenge to me at the best of times – if I am honest, I prioritized my kids over my own health for much of the last 20 years. Thankfully, back in 2010 I began to focus on my cardio, and started doing running training for 5, then 10k, then half marathons. But every year it was the same – start whipping myself into shape from January, get to the summer, take advantage of a reasonable amount of fitness until September then give it all up and become a slug until January again. And when I say a reasonable amount of fitness, I mean lose about 10 pounds but still be a good 20 lbs overweight.
However, I am the kind of person that works well with a goal. A thru-hike will be the most physically demanding thing I have ever done over 45-50 days in my life… outside of basic training (which I did at the tender age of 40 by the way…)! With my eyes on a flight date, March 25 2025, I am determined to prepare more carefully for this than for pretty much anything else I have ever done – including the half marathons I have run!
Building a Training Plan for the Arizona Trail
Now, I do have one advantage over many prospective thru-hikers. Because I am in the military, we have fitness instructors to consult, and they have helped me customize something to prepare me for the rigors of the trail. They have me doing a bunch of strengthening exercises for those small muscles in my lower body that get taxed on irregular ground like trails, for stability and to keep my footing. The last thing I want is a twisted ankle or knee to take me off trail!
For my big muscles, I have decided to focus on just increasing my walking, and as I get closer to the start I will be adding in a weight vest to simulate the backpack. I don’t want to use my actual backpack because where I live the temperature varies from 32F down to -30F. I don’t want to risk a plastic buckle cracking in the cold or the fabric of the pack getting compromised because of the cold, or any of the gear I throw inside for ballast.
Who’s a handsome boy? Watson, that’s who!
In January I planned to walk a minimum of 10 thousand steps per day. That will be a little over an hour a day of walking. I have a trusty sidekick to motivate me named Watson, and he doesn’t care how cold it is either – he has a double coat and is happy as a clam in any weather. Come February I plan to ramp up to a floor of 15 thousand steps per day, which should be about an hour and a half of walking per day. Then in March, I’ll move up the floor to 20 thousand steps per day which will definitely require more than 2 hours per day walking. I hope by then the sunrise will be earlier and I’ll be able to get most of those steps in before the kids go to school so it doesn’t take over my day.
Training for the Arizona Trail in the Canadian Winter
Depending on the amount of snow we get I may shift over to snowshoeing. If I do, my total steps expectation will drop but my time goal will remain the same – snowshoeing is definitely higher intensity than walking! Preparing for a thru hike outdoors in the dead of winter is definitely giving me an excuse to put to use everything I know about layering and frostbite protection. Not to mention teaching me about perseverance!
And the last element will be getting some vertical in. Most of my local walking trails are fairly flat, but one: Dome Mountain! The site of an old radar station, if I hike up the access road to the top it’s about 6 miles return, with a gain of about 850 feet. I hope to start doing that once a week, moving to a double go in March (up, down, then up and down again) once a week. My hope is with all of this prep, the trail won’t be quite as shocking as if I went in cold… I’ll already be going in “cold”, but cold and unprepared? I plan to be ready for 15-20 mile days once I reach Patagonia, and to be pushing 25s when I reach the vicinity of Pine. If I can do that or better I will finish on time!
January Training Results
So, how did I do in January? Seeing as how it ended just a few days ago…
The beginning of January I took a week or so to work on healthy relationships, taking a flight out to see my family and old friends out west. Unfortunately, that trip proved disruptive to my goals – I only met that step goal twice in those 9 days.
It’s chilly at the top of Dome Mountain.
On the bright side though, on my return, my trusty sidekick Watson and I built some solid pattern in January the rest of the time! My average steps per day over the month was in excess of 10 thousand, in spite of the lull. And we did Dome Mountain three times. The last time we added in an extra mile and a half before and after, doing about 8 or 9 miles along with the elevation profile. The snow on the road was fairly even due to snowmobile traffic, and the fact we haven’t had any major dumps of fresh snow.
I have also been able to add in some work at the gym, working on strength and stability of feet, ankles and knees, as well as some “Jacob’s Ladder” and the stairclimbing machine. The treadmills have been helpful, as they have variable inclines, so I can get some more glute work in.
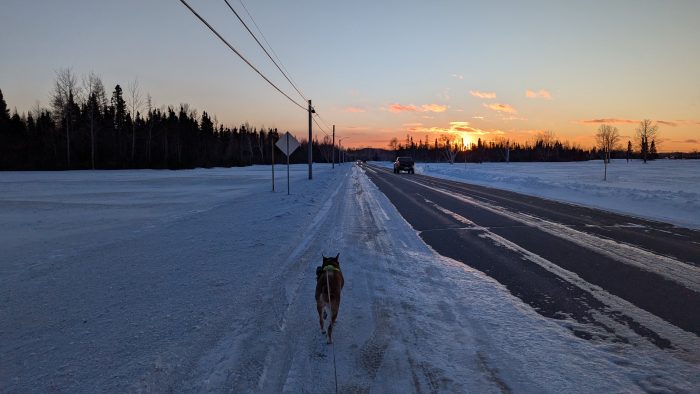
No sidewalks in the winter, only roadwalking…
The best part of all of this additional training is it has fit into less than 2 hours per day. I typically do an hour in the morning, just after the kids go to school, and an hour after they return. With the late sunrise (around 8am) and early sunset (around 4pm) this is safest, so I don’t have to worry about reflective vests. We don’t have plowed trails, so all our walking is on roads!
It hasn’t all been wine and roses. I have been watching carefully for signs of wear – blisters, chafing, etc. I have had some achiness on the back of my right heel, but it seems to have largely resolved itself. I have also had what feels like a puffy spot on the ball of my left foot, that gets a little achey and sensitive, but when I walk on it, there is no pain. I thought it might just be some inflammation, so after my big push up Dome early last Saturday morning, I resolved to take “36 hours” off. I put off my 10k steps on Sunday until the evening, giving me all day Saturday, all night, then all day Sunday as rest. It seems to have worked and I kept up my streak!
Lessons Learned and Motivation for Fellow Hikers
As the days get longer I plan to move my morning hour to before the kids go to school and more into the supper hours, to leave more time with family. I hope that this is an encouragement to anyone who is trying to figure out how to make time to train for a thru-hike whilst still doing “normal” life. You can do it!
More From This Series
Preparing for an Arizona Trail (AZT) Thru-Hike at 50 – January Results (You’re here)
In this post, we share some of the places we go to pick up outdoor gear for our backcountry trips. From storefronts in Winnipeg to online shops that ship across Canada, these are the resources we have found useful along the way. Our hope is that this list helps fellow hikers and campers track down the supplies they need for their own adventures. Note: At this time, none of these links are affiliate links. We are simply sharing resources we have personally found helpful.
Storefront Locations in Winnipeg
As we are now Winnipeg locals, we are on the lookout for places to stock up on gear and supplies for our hikes. The city has several solid options for outdoor enthusiasts. These are the storefronts we have found most useful so far. If you know of others, we would love to hear about them.
Store
Location / Address
What They Specialize In / Strengths
What to Expect / Caveats
Wilderness Supply Co. Ltd.
50 Isabel Street, Winnipeg
Big local outfitter. They carry camping, hiking, paddling, travel gear, boats (canoes, kayaks) and rentals/repairs.
It’s a great stop for specialty items you can’t always find at big box. They have a great supply of pre-made meals.
Prairie Summit Shop
Unit 1B – 675 Empress Street, Winnipeg
They stock brands like The North Face and are good for jackets, clothing, technical layering. We found the Smartwool clothing we were looking for here and on sale!
Less stock of tents, stoves, etc., but good supplement to a bigger outfitter. We arrived within 15 minutes of closing. They were very helpful and even though they had packed their meals away for the season, they brought them out for us.
MEC (Mountain Equipment Company)
303 Portage Avenue, Winnipeg
Classic outdoor/outfitter store. Good selection of backpacks, clothing, tents, footwear, accessories.
Prices can be premium. Being downtown, you will need to pay for parking.
Cabela’s / Bass Pro Shops
580 Sterling Lyon Parkway, Winnipeg
Big box outdoor / hunting / fishing store with a large footprint. Good for heavier gear, general outdoor supply, optics, tents, etc.
Skew toward hunting/fishing/outdoor lifestyle but do carry camping/hiking gear. Will not have the ultra-light tech gear that specialty shops do.
Atmosphere
Various locations
More of a sports / outdoor apparel / recreation gear store. Good for clothing, mid-range hiking gear, accessories.
Atmosphere doesn’t carry the same amount of gear it used to. Look for backpacks, thermarest sleeping pads and what food they may still carry in stock.
Mountain Warehouse
At Outlet Collection Winnipeg shopping centre
More of mainstream outdoor / clothing / walking / general gear at accessible prices.
Good for finding warm hiking layers. Watch clothing weight if planning distance hikes.
Online Wilderness Gear Stores for Backcountry Camping
If you are not able to find what you need in Winnipeg, there are many Canadian and North American online shops that carry a wide range of gear. Some focus on ultralight equipment, while others are great for clearance and discount deals.
Canadian ultralight company (BC). Tents, backpacks & trekking poles designed specifically for backcountry conditions. We use their tents and backpacks on our hikes.
This online marketplace for used & discounted outdoor gear is based out of Okotoks, Alberta. Great way to save money or find discontinued items. We have bought many items through this company. They are fast!
Based in Saskatchewan, this small Canadian company hand-makes ultralight hammocks, quilts, tarps, and accessories. We both have quilts made by Little Shop of Hammocks. You can customize your colours!
A Seattle-based company known for high-quality technical clothing and accessories like jackets, gloves, and gaiters. While not Canada-based, they ship here and their gear is well-suited to the variable weather you’ll face on backcountry trails.
Large sporting goods retailer with affordable camping and hiking gear. Their in-house brands (like Quechua) are great value for beginners. Consider this site for accessories such as underwear and gloves.
If you’ve been following my journey as I plan to hike the Appalachian Trail in two years, you’ll know that saving for the trip is a big part of the process. My goal is to set aside $10,000 over 104 weeks.
Most $10,000 savings plans are designed to be completed in just one year, which can be a heavy hit to your finances. Stretching the goal over two years makes the weekly amounts more manageable and easier to stick with long-term.
To help others on a similar path, I’ve created two free resources you can download:
A PDF tracker for those who prefer paper
An Excel spreadsheet for those who like to track and customize digitally
Here’s how they work:
The PDF Print it out and follow the columns from top to bottom—or jump around and fill in a square each week. Once all 104 squares are complete, you’ll have $10,000 saved.
The Excel File My personal favorite. You can enter the exact amount you save each week, whether it’s a regular deposit or a little extra from unexpected income. The spreadsheet updates automatically, showing you how much you’ve saved and what’s still ahead.
It is my hope to make my dream of hiking the Appalachian Trail in 2027 a reality. Up until now, I have always hiked with my husband, but in 2027 I want to hike the Appalachian Trail as a solo hiker. As long as I can arrange the time off of work, I will be hiking the Appalachian Trail in 2027.
In April 2025, my husband will be hiking the Arizona Trail as a solo hiker. We section hiked the Arizona Trail last year and enjoyed it. He wanted to do a hike that he could pull off this year with time off and something warm. I’m sure he’ll explain more about his reasons in a future blog post. He hasn’t expressed as much interest in doing the Appalachian Trail as I have.
I Want to Join Others On the Appalachian Trail in 2027
There are multiple vlogs each year from people who have hiked the trail. I thoroughly enjoy watching everyone’s story and journey as they have pushed their limits to reach Katahdin. Vlogging has become something that I enjoy doing on the trail, so when my turn comes to hike, I will be vlogging. It is such a great way to document your hike and revisit it later. It is also a great way to show other people, like me, what the trail offers. Every time I watch people on the trail, I get more and more excited about it.
How Am I Saving For The Appalachian Trail?
Why am I thinking about it so early? My planned start is still 2 years away. Well, it is going to be expensive to hike the Appalachian Trail. I am currently working through a budget as if I am going to spend 5.5 months on the trail. My rough estimate for savings in 2 years is $10,000. Some people would say that is about right. Some would say that’s too much. That is $10,000 CDN and I will need to consider what the exchange rate will be when I decide to go. I would like to save more than $10,000 so I have plenty of flexibility with bad weather days or even healing up from who knows what.
I found a plan to save $10,000 in 52 weeks and have started putting money away following this plan with a slight modification. When it wants me to save $150 in one week, I am stretching that amount over two weeks: $75 in week 1 and $75 in week 2. This allows me to extend the plan over 104 weeks and will have $10,000 by the end of February. If I end up with bonus money, I will throw it on there as well.
In a future post, I may share what my budget looks like. It is still a work in progress, but it might be helpful for someone.
Another Way to Fund My Appalachian Trail Hike
A few years ago, I also started writing. I have a pen name and write sweet romance novels & short stories. Think Hallmark movies. Right now, I have two available on Amazon and any sales generated from these will go my Appalachian Trail fund. I am also in the middle of writing another romance involving backpacking near a small town. I’m hoping to release a couple of novels that will not only fund my trip, but can help to bring in more while I am on trail. Every little bit will help.
If you enjoy books and you want to help my Appalachian Trail fund, you can find my books here:
I am going to be watching the 2025 and 2026 hikers and continue to capture data on the distances they hiked early on versus later mileage. I’ll definitely be checking what tenting sites look like around the shelters and make note of where I will want to stay. Already, I have downloaded the FarOut App with the Appalachian Trail route. (Yay for Black Friday sales!) I am a geek so I have been creating a spreadsheet with all of information I have gathered so far and, of course, my budget.
2027 might be seem far into the future, but there is so much planning involved that I am happy to have time to save and gather as much information as I can (even if some information will change between now and then.


