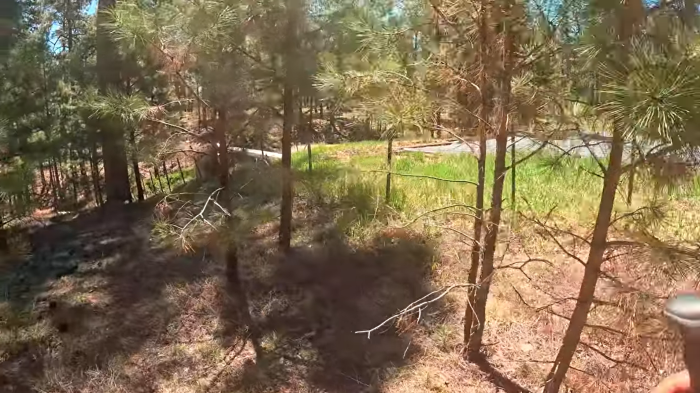
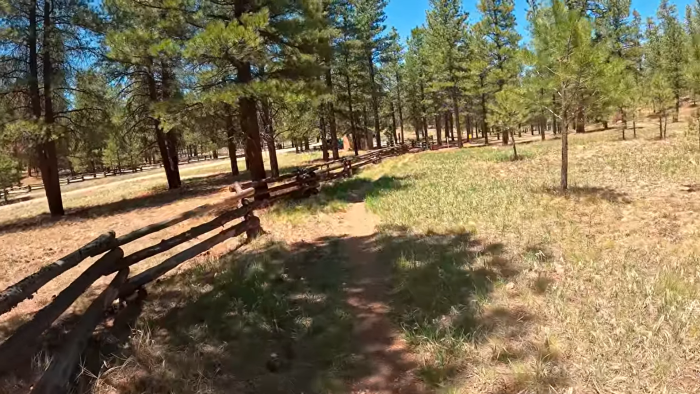
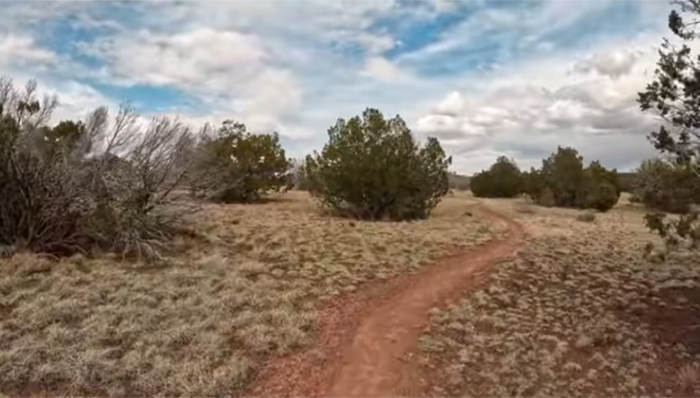
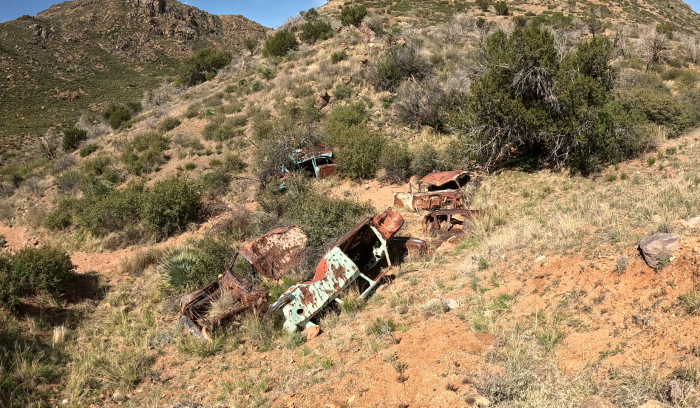
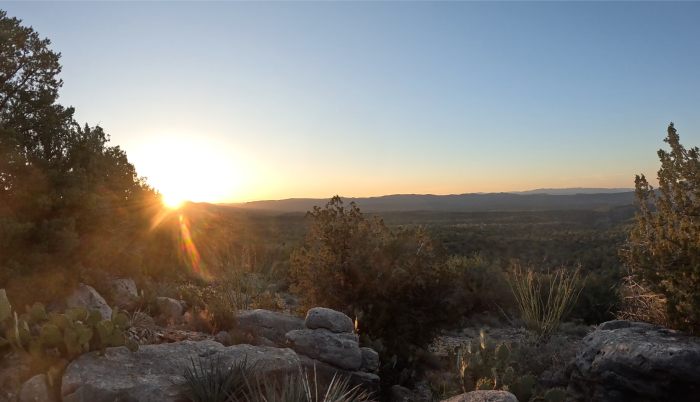
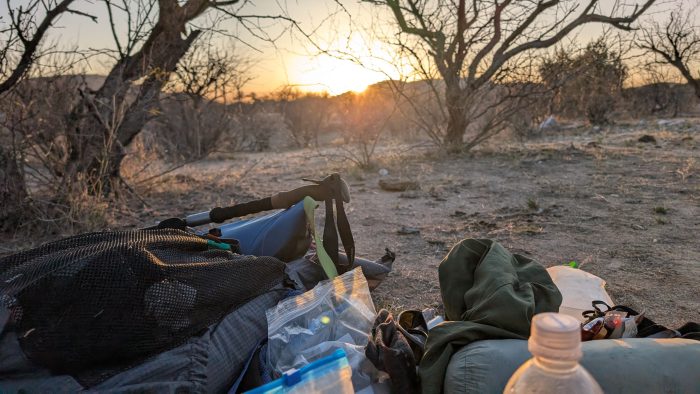
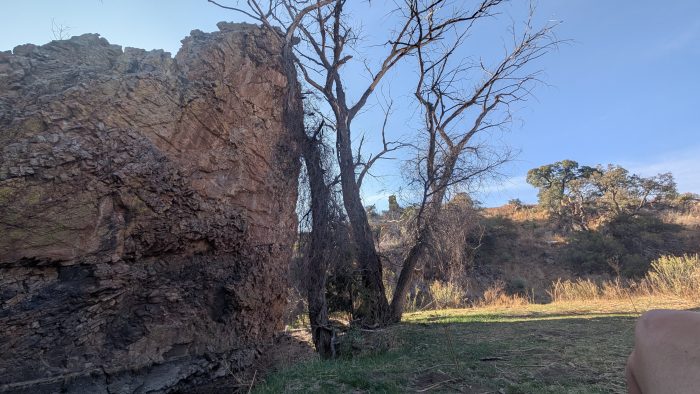
The gear is currently being sorted, the maps have been studied, and the countdown is officially on. This summer, Oliver and I are heading to the northern tip of Vancouver Island to tackle one of Canada’s most rugged coastal wilderness experiences: the North Coast Trail.
We have locked in our Cape Scott water taxi transport and purchased our BC Parks backcountry permits. Everything is official, and we are ready to head to the trail.
What Makes the North Coast Trail Unique?
For those unfamiliar with this stretch of British Columbia, the North Coast Trail (NCT) is often considered the wilder, more remote cousin of the West Coast Trail and can include an extension of Cape Scott Provincial Park, which we’re also doing.
Here is a quick look at what we are stepping into:
The Distance: The trail spans 43.1 kilometers (about 27 miles) from Shushartie Bay, reachable by water taxi, to Cape Scott junction, but that is just the NCT portion. On our way to the Cape Scott trailhead parking lot where a shuttle will pick us up, we will tack on the Cape Scott Trail, a day trip to the lighthouse, and a stay at San Josef Bay camp, bringing our total trek to around 80 kilometers.
The Terrain: This isn’t a casual walk on the beach. The NCT is notorious for its challenging terrain. We will be navigating tidal crossings, climbing steep headlands, using cable cars, scrambling over slippery piles of driftwood, and wading through the island’s legendary deep mud.
True Wilderness: The area is incredibly remote. There are no towns and cell service is nonexistent. It is prime habitat for coastal wildlife, meaning we will be sharing the coastline with black bears and wolvess.
Follow the Journey
Because this trek promises incredible views and plenty of challenges, we are bringing you along for the ride. As always, we will be documenting the entire experience to share with you.
Once we emerge from the trees and get back to civilization, you can look forward to:
Detailed Trip Reports: Breakdowns of our daily mileage, campsite conditions, and trail notes.
Trail Videos: Video documentation of the trek, from the water taxi drop-off to the muddy realities of the inland sections.
We are incredibly excited to challenge ourselves on this stunning slice of Vancouver Island.
Stay tuned for updates, and we will see you on the trail!
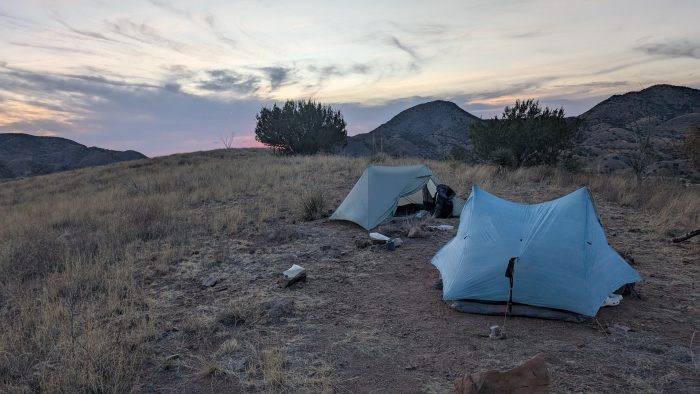
There is a specific kind of magic in the “halfway” point. Whether it is reaching a literal summit or, in this case, hitting a major financial marker, the view from the middle offers a clear look at how far I have come and exactly what is left to conquer.
I am thrilled to share that I have officially hit the $5,000 mark in my dedicated savings for the Appalachian Trail. Having$5,000 tucked away for gear, food, and resupply stays makes the dream feel tangible. However, as any hiker knows, you don’t just plan for the climb; you have to plan for the descent and everything in between.
Beyond the Backpack: Staying Home-Ready
While the $10,000 trip budget is strictly for the trail itself, the “real world” doesn’t pause when I step onto the white blazes. To make this five-month journey possible, I am simultaneously building a separate “Home Fund.”
The goal is to fully cover five months of household expenses. This ensures that while I am navigating the trail, the mortgage is paid, the lights stay on, and my family remains supported without any financial strain. It is a dual-track savings marathon, but seeing the trip fund hit its midpoint gives me the confidence that this second obstacle is just as manageable.
Fueling the Dream Through the Page
A huge part of this momentum comes from my writing. It is a unique joy to know that every book sold is quite literally a step toward the trail. As I dive into the final stages of my next release, the progress feels even more meaningful.
The characters in this upcoming book are finding their way through their own challenges, just as I am navigating the logistics of this two-year plan. I am currently deep in the editing process, and the excitement of bringing this new story to you is matched only by the excitement of seeing my “Trail Savings” account grow.
While the hike is still a way off, the preparation isn’t just happening in my bank account. I have started a dedicated fitness routine now to ensure I hit the trail strong and, more importantly, stay injury-free.
Success on a thru-hike often comes down to how well your body can handle the repetitive stress of the miles. I have been incorporating specific workouts, including some great virtual reality sessions in scenic locations, to keep my cardio up and my movements fluid. Building this foundation early means that when I finally shoulder that full pack, my body will be ready for the challenge.
The Two-Year Countdowns
I am officially one year into my two-year plan. The discipline of the past twelve months has proven that the $10,000 trip goal is within reach. It is a lot of spreadsheets and even more early morning writing sessions, but every bit of effort is an investment in the 2,000+ miles ahead.
This article first appeared on The Trek on October 28th 2025.
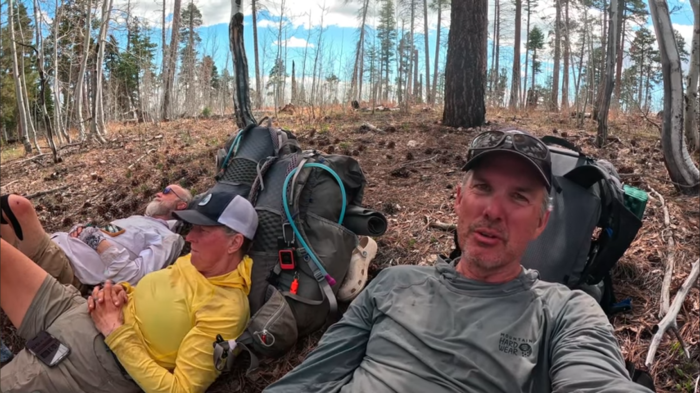
I have no idea why it took so long for me to post this final post on my AZT thru hike in the spring of 2025. Perhaps by writing it I would feel like it was well and truly over and I didn’t want that. Perhaps it was because I took more video than photos on the last few days, and I regret that (so almost all of the below photos are screenshots from my videos). But for those who like blogs, here’s my last one from the trail.
Day 44: Grand Canyon Village & Mather Campground
My stove burner broke the evening out of Flagstaff, so I ordered a cheapo BRS3000 from Amazon to be shipped to the post office in GCV. I also ordered a new pole mount for my GoPro after I realized that was split as well. So on our arrival in the Village I was at the post office. And… Neither arrived. Checked again on my zero… No dice. Ended up having to cancel both orders. Luckily the General Store had an MSR PocketRocket burner, so I grabbed that to use with my jetboil pot.
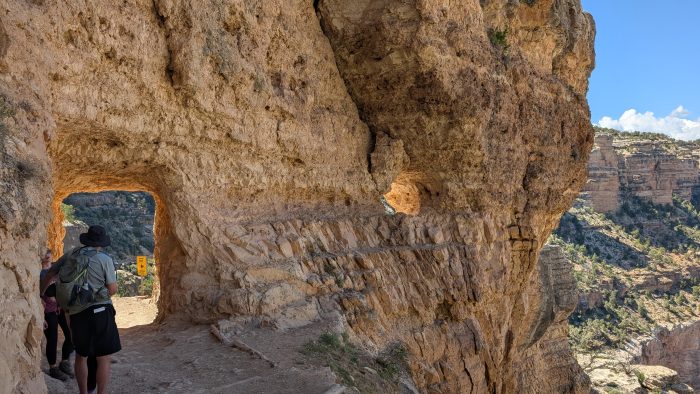
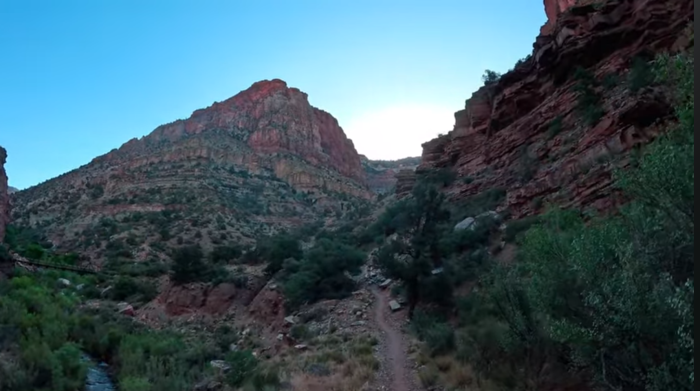
We hiked a mile down the Bright Angel Trail just to get me used to the canyon… ha! Not so much!
We spent the day just enjoying the relatively sparse crowds compared to high season. Took in the first mile of Bright Angel Trail but we could not take it down as the construction on the water lines do not allow access to the Colorado at the bottom. The AZT this year follows South Kaibab instead. Still staring into the big hole all day did at least give me some time to get used to the environment. Sorta.
We had one last nice dinner at the Bright Angel Steakhouse. Excellent ribs by the way. Then we retired to the campground for an exciting morning.
Watch Day 44 of Oliver’s Arizona Trail series:
Day 45: South Kaibab Trail, Phantom Ranch & Cottonwood Campground
Did I mention I am afraid of heights?
We were delayed a little because the bus we needed to South Kaibab would not come to the Mather Campground until 7:30. But we weren’t worried because we only needed to make 16 miles to Cottonwood Campground.
It was at this moment I thought about how awful a plan it was to hike here. Did I say awful? I meant awesome.
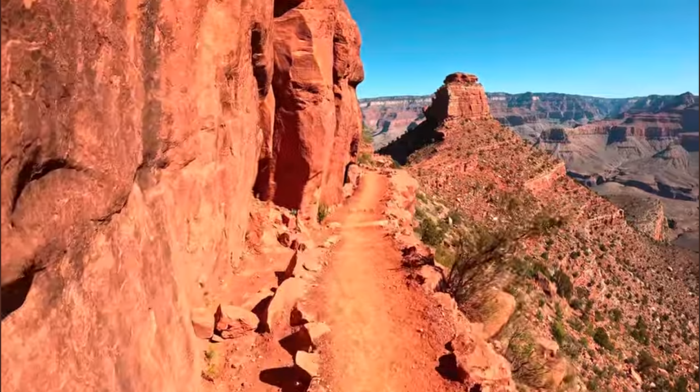
South Kaibab is steeper than Bright Angel. We hoped it would be less trafficked, but it was not to be. Even the mules were on the trail! However being perhaps the busiest piece of trail we would hike on the entire AZT I really enjoyed the social aspects of talking to people from all over the world, visiting perhaps one of the most famous attractions in the USA. Mixed in were athletes hiking Rim-to-Rim or Rim-to-Rim-to-Rim, and we saw it all. We even saw rangers busting underprepared hikers, either not prepared for the sun, without enough water, or putting themselves in other danger.
I mean, as long as I have a hand on a rock face I won’t fall right? Right?
As I approached the Colorado, I had to be in awe. Every few steps was another astonishing vista. Words do not do it justice. In retrospect, NoBo really is the way to do the AZT because the Grand Canyon becomes the climax of the experience. And a worthy climax it is too.
A special treat awaited us when we reached Phantom Ranch. My information indicated it was closed before I set out on the AZT but when we reached it, it was open and serving ice cold lemonade! 6 dollars was a small price to pay in the heat of the canyon.
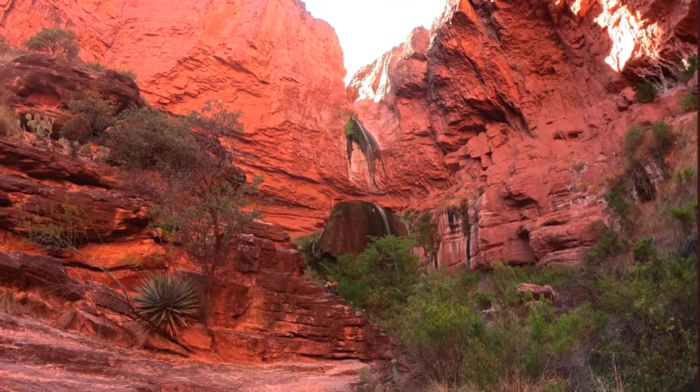
After some tasty refreshment (and some entertainment as a squirrel was attempting to break into unwatched backpacks) we began the journey up North Kaibab, following Bright Angel Creek. Again, stunning views as the canyon flirted with slot canyon status. A couple miles short of the campground we decided to take a side quest, Fording the creek to go in search of Ribbon Falls.
Ribbon Falls
I highly recommend this side quest.
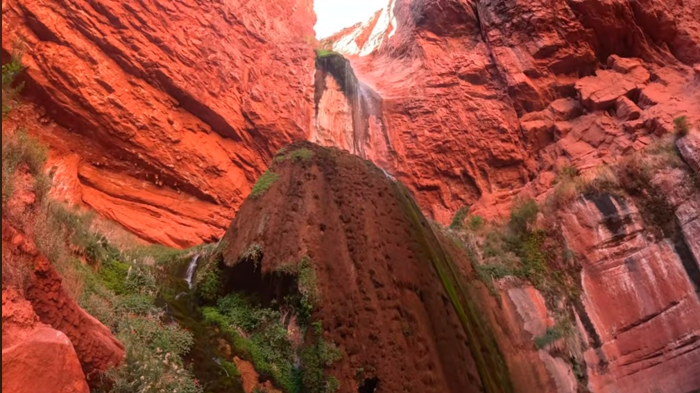
Ribbon Falls even closer.
The camping spots in Cottonwood left a bit to be desired. Both spots for AZT hikers were at the far north end of the camp, farthest from the creek and water, as well as the toilets. And cramming 3 or 4 tents onto the cramped, hard packed tentpads was not an easy task. The terrain around the tentpads was not conducive at all to overflow. That said, we got a good night’s rest, and food storage box was secure enough to protect from rodents.
Watch Day 45 of Oliver’s Arizona Trail series:
Day 46: North Kaibab Trail & North Rim Gate
Going up!
What a day! As we packed up I found myself staring up at the northbound trail, wondering just how I would respond to a lesser used, probably not as wide or as hiker-friendly a trail as the South Kaibab had been. Plus, the peak elevation on the North Rim was to be over 9000 feet so we had more climb to come than probably any single day we had hiked. (Looking back on my planning notes, I had originally estimated the climb out of Roosevelt Lake to be the biggest one day gain. But the actuals show that this was my biggest one day gain at 5876 feet of vertical!)
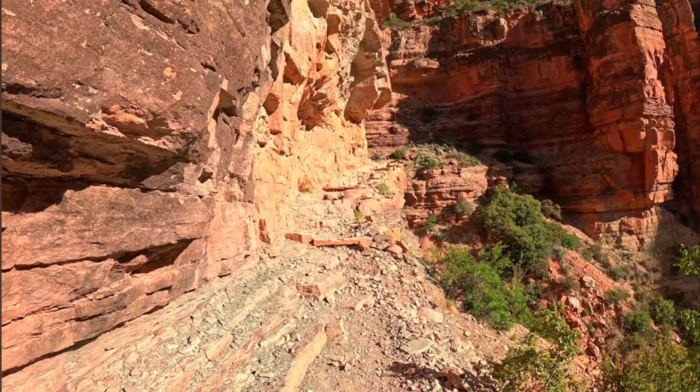
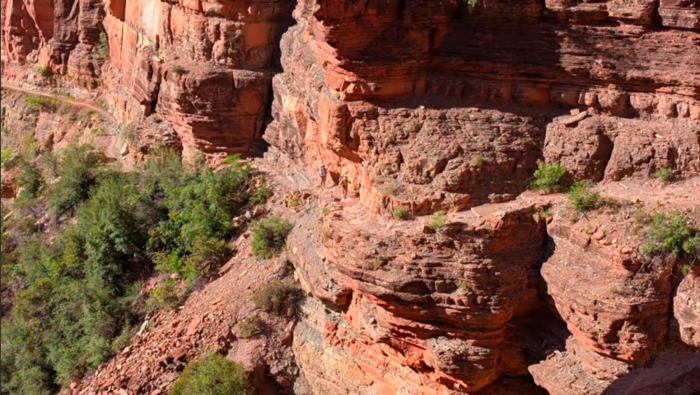
A sketchier section of the trail. At least it was a good 4 feet wide!
My trepidation was earned. The trail north for a long stretch had been blasted out of cliff faces. The rock hung over my head and dropped off into an unknowable abyss on the other side (well, it was probably knowable, but I wasn’t going anywhere near the edge to look!) I set my mind to the task and persevered, telling myself that despite my fear, I had to persevere, because going back was not an option. That said, I did enjoy my rest breaks on the climb, when I could set my pack down and set my back against the cool rock and look back at the death-defying trail I had just traversed. Some bird had a call on this stretch that mocked me, sounding like the whistle of Looney Tunes falls from the endless battles of Wile E. Coyote and the Roadrunner.
Looking back at the trail, it was even scarier than I felt passing through it.
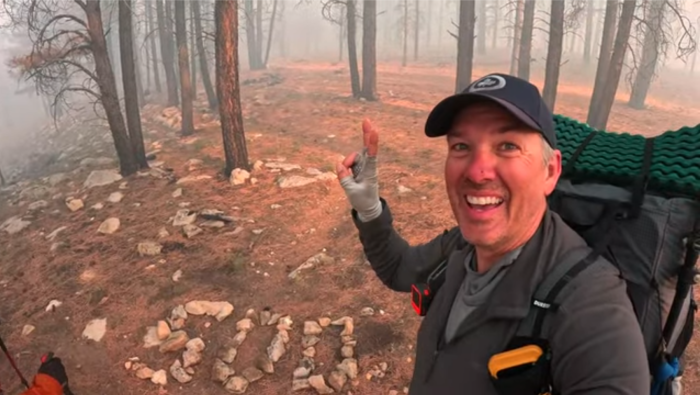
About a half mile from the top, the combination of elevation and exhaustion took me out, and I had to pause as I fought off nausea. Thankfully, I did not get any sicker, and after 20 or so minutes of rest I struggled up to the parking lot, where my hiking companions awaited my arrival, and recorded my steps over the last giant sized stairs.
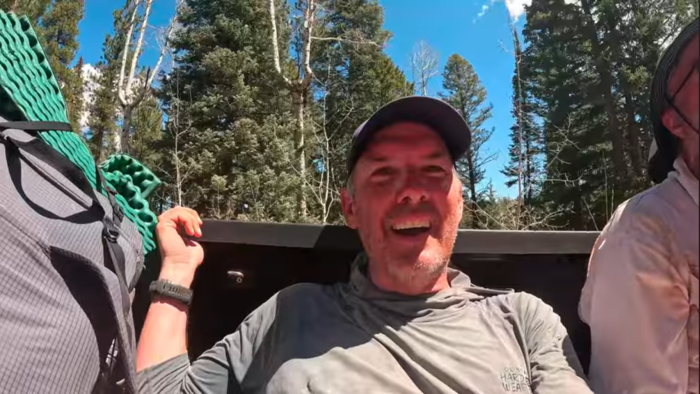
We absolutely did NOT ride in the box of a pickup on a public road!
As we examined our options for water resupply (the taps at the trailhead were still off), a group of friendly staff from the lodge who had walked a mile down the trail to pass some time offered to give us a lift up to the lodge taps, which were on. That saved us 3 miles of sidetrail! We happily accepted and after refilling our water, lunched at the trailhead.
Our afternoon was much easier, walking over wooded terrain on very old access road/trails. The trail was very reminiscent of our afternoon after conquering the Mogollon Rim. We passed electrical boxes which resembled green plastic coffins. I joked that they housed the North Rim Vampires who come out at night. But all of us were tapped out from the climb, and found ourselves resting often throughout the afternoon. Being close to the end and having left behind the last major obstacle, we felt much less urgency.
This is what urgency looks like when you have just finished the North Kaibab climb.
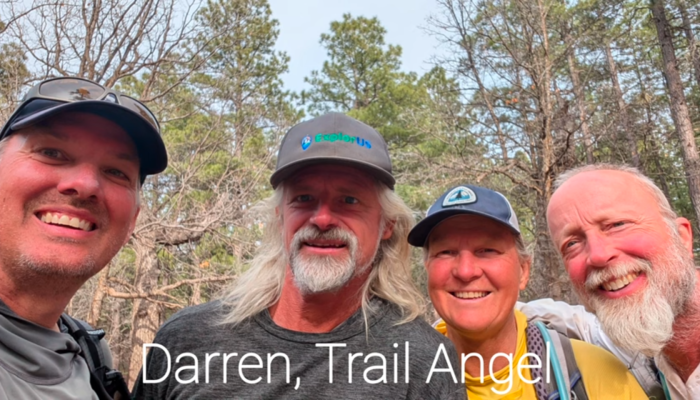
Our day ended as we reached a caretaker’s cabin adjacent to the North Rim Gate. We found a public toilet there, almost at capacity because the season had not yet begun and it had not received any maintenance since the fall. A van rolled up revealing a trail angel who was supporting her husband hiking just ahead of us and restocking some of the caches. She blessed us with some treats and water, and advised us it was fine to camp near the cabin, which we did. We did not do as many miles as we had hoped, (16.6 miles) but it was enough.
Watch Day 46 of Oliver’s Arizona Trail series:
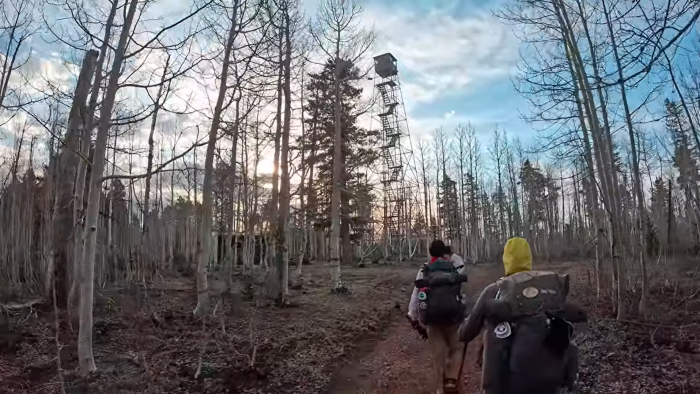
Day 47: North Rim Watchtower & Telephone Hill
An early morning visit to the North Rim Watchtower (retired)
Early in the day we were able to find the fire watchtower and take some photos there, which was a very short side trip. Sadly, the top of the tower was locked just like Grandview. We found ourselves walking through open glades between stands of pine all day. These open glades seemed natural, though in my experience openings like this tended to be boggy affairs, these ones were pleasantly dry. We encountered a couple vestiges of snow on the trail, but no more than 20 or 30 feet at a time, easily bypassed.
Take Charge tackles a snowy traverse… I just went around to the right.
Easy walking, combined with another unique landscape caused the day to pass quickly, until we reached the old burn area around Telephone Hill. A stocked water cache was there which set us up for camp, but the open, windy conditions had us worried that a suitable camp spot may not be found. We met up with the same trail angel at that cache as from the day before, and had another pleasant chat, then walked down the hill into a patch of young aspen trees, and hoped that they would be enough to keep the wind from pounding us all night. The ground was heavily hummocked which didn’t make for the best pitch of our tents or smoothest ground to sleep on, but the hummocks were earth rather than stone so the sleep was reasonable. With the easy terrain and a good night’s rest, we were more than happy with almost 23 miles today.
59 miles left???
Watch Day 47 of Oliver’s Arizona Trail series:
Day 48: Orderville Trailhead & Jacob Lake
Buffalo Trick Tank – a rain collector that runs downhill into a tank for water.
Orderville Trailhead, just in time for a lift from Sweet Time’s Sweetie!
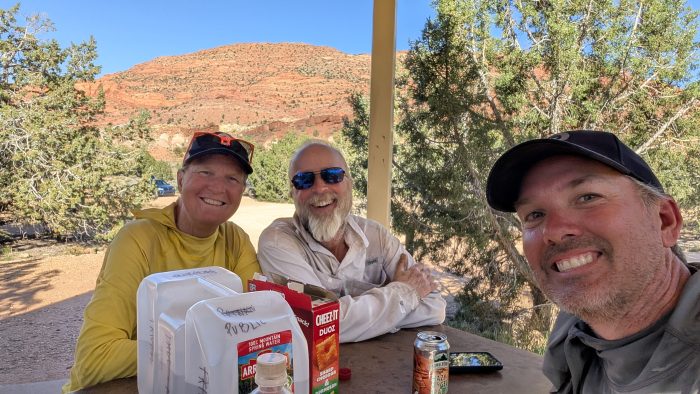
Our morning wound along access roads used to fight the fire when it burned over the area, and the wind continued to pummel us but the sun was out, so spirits were high. We met up with another hiker named Sweet Time during a morning break, she was hiking faster than us, so we quickly waved goodbye. At one point, Cheers found his trail legs and blasted ahead of Take Charge and I, and we didn’t see him again until a wildlife tank some 6 miles ahead. We bumped into Sweet Time again, and saw evidence of our trail angel friend at a campsite with a toilet, and found out that Sweet Time had plans to meet her girlfriend at a trailhead adjacent to Jacob Lake at 2pm. We considered that, and decided to try to make the miles necessary to arrive at the same time, to get a lift into the gas station/restaurant/campsite/resupply point early enough to make some more miles afterwards. Luckily the ground cooperated and we went even faster than we thought, finally catching up to Cheers and arriving at the trailhead an hour before the pickup.
We shared an awesome late lunch together, realizing that our time together was avery quickly drawing to a close, which tinged our conversation with some bittersweet angst. We talked about the possibilities of hiking again together in the future, and our conversation finally came around to our finish. Did we want to camp short of our goal on day 49 and stroll into the border campground on the morning of Day 50 as we had arranged, or shoot to end the afternoon/evening of Day 49? With the march being mostly downhill into the finish, we decided to push some 6 miles more tonight, then see if we could reach the border on the 49th day. It appeared other hikers we had seen had pushed hard to finish early, so we would not see people like Ballsack and Cliffhanger, or Lisa from Germany again.
Sunset on our last camp together. A great time was had by all.
Resupply at Jacob Lake was not the greatest, and the campground at the gas station was not yet open and accepting people, so our decision to push on was a good one. We got enough for one more day on trail though, and thought we could always camp at the border campground and await our pickup the next day with relaxation. We set back out and found a random spot to camp just shy of another burned area, 21.5 km total for the day. “Our last trail camp together” was shared with laughter and one last “Poor Man’s Pad Thai”.
Watch Day 48 of Oliver’s Arizona Trail series:
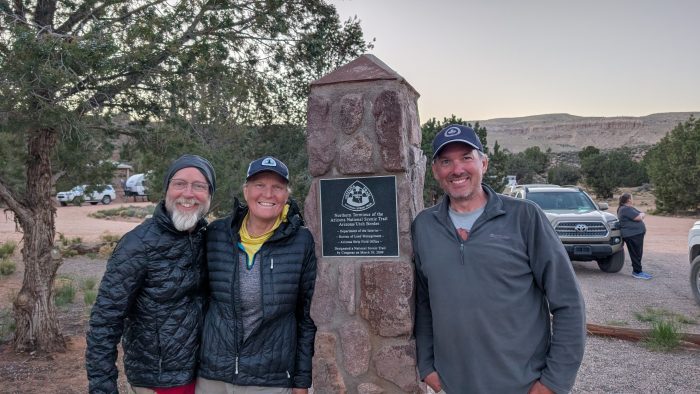
Day 49: The Utah Border & Stateline Campground
The burn was exposed but at least it revealed lots of scenery
Another windy start but sunny, we proceeded into the burn. We were surprised to observe an especially large gust of wind rip the top off a dead pine and drop it on the trail about 200 yards from us. This caused us to hurry as fast as we could through the deadheads. The trail dropped down onto a flatter area and wound along the eastern edge of a very large open glade. The trees became smaller once again, drying out as we approached Utah. I attempted to contact my trail angel pickup, to update her on my new itinerary, just letting her know she could arrive early on Day 50 if she wanted to since we would already be at the campsite. But reception was spotty and it was not until late in the day we were able to communicate. Much to my surprise she offered to come out this evening!
The pink cliffs of Utah…
Gradually as we wound through the hilly terrain, we began to catch glimpses of what must inevitably be Utah. Pink cliffs peeked out, getting more and more vivid as we edged closer. We reached another wildlife tank with only 6 miles left – this was where we had planned to camp before, but it was only 3pm so our confidence of finishing today became even greater. We burst out into the open with views right down to the narrow valley that coincided with the border. The surrounding terrain was absolutely magical. We tried to guess where the campground was, but it was tucked away and largely invisible until we were in it. A switchbacked descent down into the valley, a quick crossing across a grassy field, and suddenly the monument!
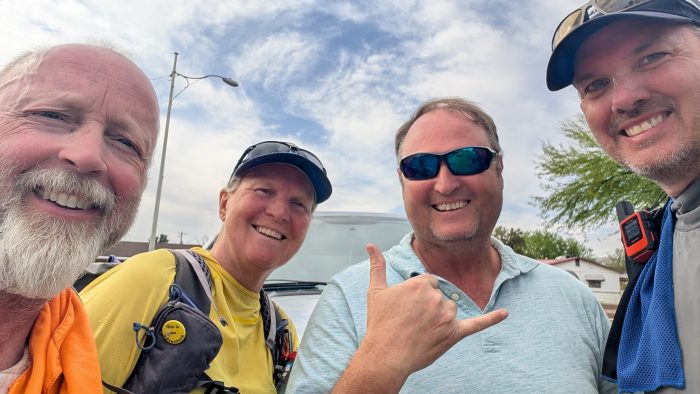
From Mexico to Utah together! Trail BFFs
The campground was well appointed, except for water. Sun shelters over well built picnic tables at every campsite, excellent privies, and a very friendly atmosphere. The place was PACKED with people, which was a surprise because we imagined a rustic barely frontcountry camp far from civilization and realized this was a popular staging ground for people to visit the Grand Staircase National Monument, the “Wave”, and other beautiful natural wonders. Thankfully, another thru-hiker named “Lightfoot” (from Norway, she’s an incredibly experienced hiker!) had secured a site and welcomed us to her space. I hung out with my friends, reminiscing about the trail and our experiences until 7pm when my ride showed up to whisk me off to an in-law suite to clean up and prepare for my journey home.
Under one of the shelters at the campsite. Everything but water… but thankfully Trail Angels left some for us and other finishers!
What a trail! What an experience! I am so grateful to my wife for supporting me in this mission, holding down the fort with our teenagers. She is determined to have her own experience like this and true to our relationship, plans to show me up by doing the Appalachian Trail in 2027! I am looking forward to trail angeling for her and watching as she challenges herself and meets all the weirdos and strangers who like hiking so much they do it for months at a time! I am thankful that in this season of my career I was able to do this, that vacation days could be lined up to take the time away, and my chain of command supporting it. I am also incredibly grateful for the community that surrounds the Arizona National Scenic Trail – the trail angels, the trail maintenance teams, the trail stewards, the organizers at the Association who liaise with all kinds of stakeholders without whose support this trail could not exist.
I think I will do one more post on my adventure on the aftermath – how I have felt after returning to “real life”, whether all went as planned, what benefit it has made to me in terms of health. Stay tuned for that!
This article first appeared on The Trek on May 27, 2025.
Day 38: Zero Day in Flagstaff
Day 38 was a zero day in Flagstaff, we had resupply to do and some shopping to get out of the way. Lunch at a nice Mexican place in the downtown plaza, comparison shopping at just about every outdoor store in town (and there are around 5 or 6 at least). I realized when I sent my rain pants up to the end, I had actually sent my coat and kept the pants. Given the forecast was rainy, I had to bite the bullet and buy a new raincoat. I also decided to replace my shoes, since the grand canyon was not going to be easy on feet and the Lone Peaks were already feeling every rock on top of having lost most of their grip in 250 miles of AZT. Cheers and TC grabbed some freeze dried foods and new warm gloves. Our other hikers friends were going to a bluegrass concert that night and invited us but I am sorry to say us old fogeys lamed out.
Watch Day 38 of Oliver’s Arizona Trail series:
Day 39: Back on Trail Toward Snowbowl
In the early morning we faced a dilemma as we tucked into a famous breakfast joint on Route 66: do we walk the blue line through town or Uber up to the red line at the edge of town? What ended up deciding it for us was the camping restriction. Flagstaff banned camping within 16 miles of town to prevent forest fires. We Didn’t want to chance running out of steam and breaking the law so we Ubered up to the red line.
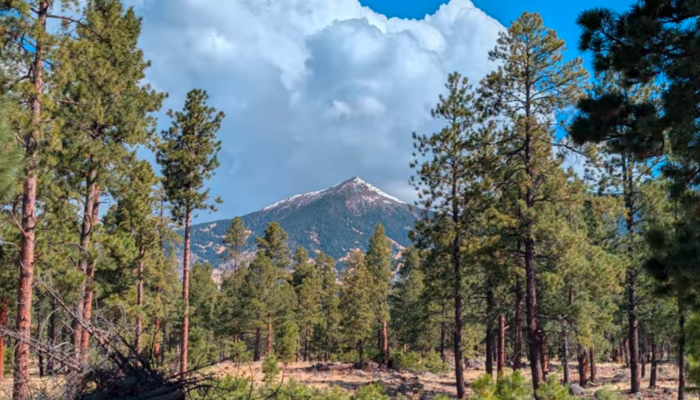
Mount Humphrey looms in front of us…
And immediately we were confronted with a mountain bike race taking up the trail. An hour of stepping out of their way every few steps and we began to get testy (well, I did anyway). Thankfully nothing lasts forever and we pushed up to Snowbowl.
Heading up Snowbowl. Big trees, a few big climbs.
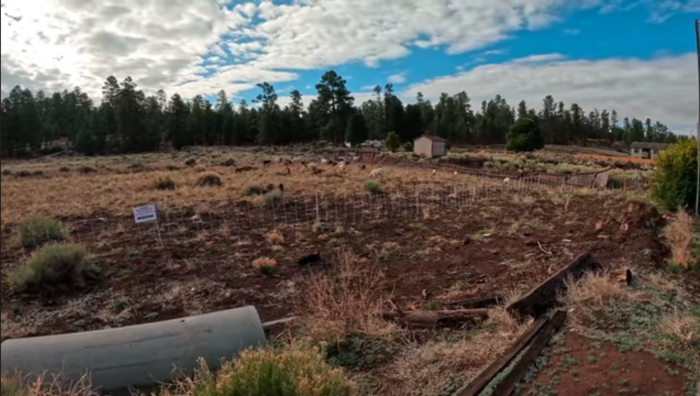
It was cold up there. We did see a few flakes of snow and the peak was socked in. But we kept going and managed to drop some to a warmer level, and set up camp at Kelly’s Tank, which features a bear box with a water Cache!
Watch Day 39 of Oliver’s Arizona Trail series:
Day 40: Across Babbitt Ranch
After descending from the heights, we end up on a gently rolling landscape with plenty of open fields: perfect cattle grazing land. Also home to Babbitt Ranch, we had a mix of easy road walking and easy trail, but mostly exposed. We were expecting weather and cool temps but they didn’t really materialize. Off and on clouds and wind and spitting rain made for a mostly good hiking day. We thought a storm was going to hit us at one point but the wind pushed the cell past us. Awesome water source for lunch, a pristine tank with a flowing spigot gushed clean water down a hill into a cow puddle.
Camp that night wasn’t spectacular: the low trees widely spaced didn’t offer much cover from the wind but it turned out ok.
Camp looked pretty much exactly like this.
Watch Day 40 of Oliver’s Arizona Trail series:
Day 41: Trail Connections and Cache Encounters
Only a little moisture on the tent in the morning. Yay! We beat our feet across some more open fields, and watered up at a wildlife rain collector along with 6 other hikers, some of which we knew. It’s always fun to meet up and swap stories, enjoying moments of connection with other thru hikers.
Here we are just a Sawyer Squeezin’ and Swappin’ Stories…
We would run into another water source party in the afternoon at a water Cache, and it was just as much fun if a trifle warmer and sunnier. Camp wound up being on a nice grassy spot adjacent to a gate.
Watch Day 41 of Oliver’s Arizona Trail series:
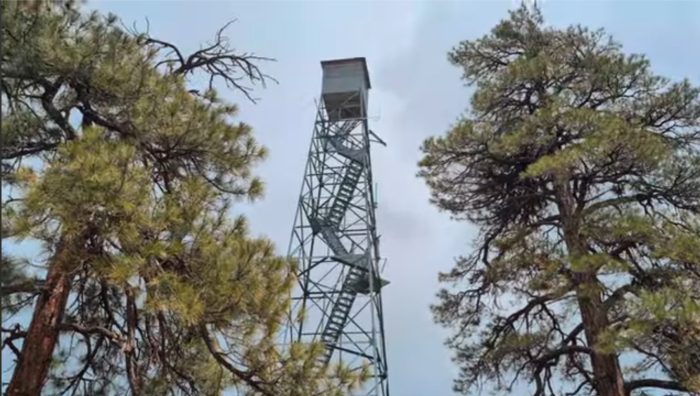
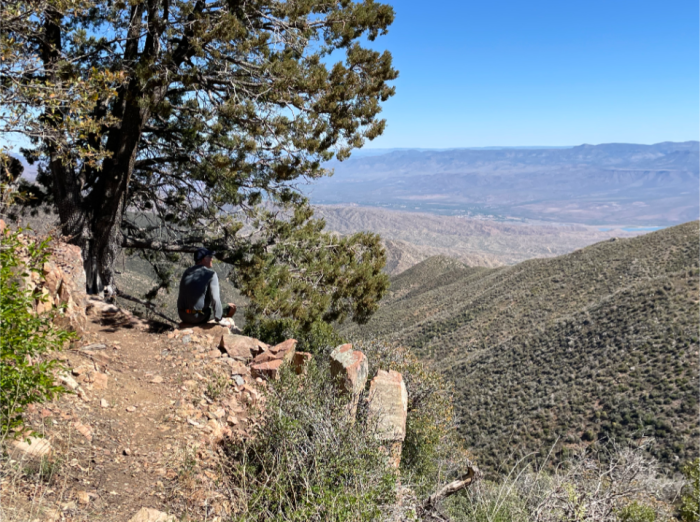
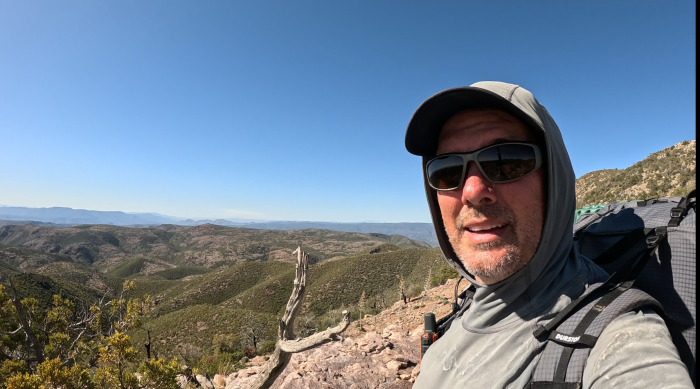
Day 42: Coconino Rim and Grandview Tower
Two days forecasting miserable weather have not yet materialized. Would this be the day? We need to make 20 miles at least to position us for a nice easy coast into Tusayan and then Grand Canyon Village. Today featured our arrival at the Coconino Rim, a break of land on the East end of the Grand Canyon, our first glimpse of the “big hole”, and an old fire watchtower.
The weather kept up its suspiciously variable conditions but little materialized… Until the end of the day. More on that in a minute. We arrived at the rim and it was lovely, we had lunch at a nice viewpoint. When we arrived at the tower, I decided to brave the iron grating stairs to see if I could access the top. Sadly the hatch was locked, but good views were had despite my fear of heights. When I returned to the ground we were surprised by Lisa from Germany who rolled up, we hadn’t seen her since the day before Flagstaff.
Grandview Tower! That’s a long way up…
As the day wound down the weather cranked up, and we decided to pitch a little before 5pm to dodge the weather. We were successful but the weather blew over we I think 30 minutes so it once again turned into a non-story. But we were only 6 miles from Tusayan so our plan was intact.
Watch Day 42 of Oliver’s Arizona Trail series:
Day 43: March to Tusayan and Grand Canyon Village
Up we got bright and early at 6am and my heart was set on a McDonald’s feast for breakfast. I packed up like lightning, only to find my companions sitting down to a breakfast of instant oatmeal. “What are you doing?” “Having breakfast…” “Well I’m having McDonalds. See you there!” And I hit the bricks, determinedly setting out alone for the wretchedly addicting home of the sausage McMuffin.
I bolted down the trail and reached town, wandering through the campground and emptying my trash. I made my way across the backside of the buildings along the main thoroughfare and ran into something very curious: fire suppression goats! A herd of goats taking down the grass to prevent wildfire coming into town. It gave me pause but only delayed the inevitable: an egregious amount of McDonalds breakfast.
Fire Suppression Goats!
My companions caught up to me 15 minutes later, and together we hit the paved trail and matched into Grand Canyon Village. Our plan was to take a (very expensive) night in a hotel, expecting we would be coming in wet and cold, then take a zero in the campground. Turns out we weren’t wet and cold but the room was paid for so we enjoyed one last comfy bed before our final match to the finish.
This article first appeared on The Trek on May 25, 2025.
Day 32 – Rest, Resupply, and Pinewood Tavern
This was a resupply day in Pine, and well deserved. We made som breakfast sandwiches in our VRBO then headed into town to enjoy some quaint shops before doing our resupply. Had an incredible steak salad at the Pinewood Tavern, then stocked up. Found out today that Vince is the guy if you need a lift around town. His info is on FarOut somewhere but it’s not easy to track down. We cooked supper at our house too, a vast amount of pasta that we could not finish.
Watch Day 32 of Oliver’s Arizona Trail series:
Day 33 – Under the Shadow of the Mogollon Rim
Vince drove us bright and early over to the Pine trailhead, and we enjoyed the day hiking below the Mogollon Rim with beautiful views of their mighty cliffs to the north and to the south a vast forest. We set a lofty goal of reaching Washington Park, an area at the base of “the climb” to the top of the Rim. Unfortunately, camping spots were scarce and the night was chilly but we made it through.
Looking up at the Rim… Gorgeous.
Watch Day 33 of Oliver’s Arizona Trail series:
Day 34 – Prescribed Burn
The hike up to the top of the Rim was probably worth doing slower as there was tons of history in that beautiful vale. The headwaters of the East Verde River were gorgeous. Conquering the Rim was easier than we thought it would be, but we were in much better hiking shape. Getting up onto the plateau was a very dramatic shift, and welcome with lots of shade, gently rolling terrain, and not as much pressure on our legs and feet.
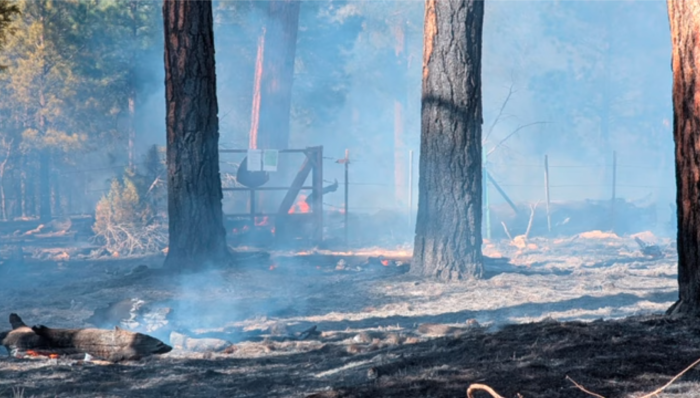
In the afternoon, we spotted smoke. It wasn’t a concern until it was… The trail inconveniently turned and guided us straight towards it. We came down a hill to a front country campground and were met by some rangers in a truck who advised us that a prescribed burn was taking place over the trail and we needed to reroute. To soften the blow he mentioned that the ranger station nearby had cold pop and ice cream of we made it there before the end of the work day. We didn’t, but as staff trickled out they generously let us in to buy an ice cream sandwich for a buck!
Deciding on what to do took some pondering. The smoke was blowing across the road, and also onto the reroute so we decided to camp and see if it was better in the morning. We found a spot adjacent to the ranger station because we wanted to be able to access the station’s pit toilets, picnic tables and water spigot in the morning.
There’s fire behind that AZT gate!
Watch Day 34 of Oliver’s Arizona Trail series:
Day 35 – Smoke, Storms, and 500 Miles
When we awoke, the smoke was no longer blowing over our campsite. However, fires were smouldering in the burn area still, and smoke was thick over the reroute. We decided to tough it out, and it took almost 2 hours to clear the smoke.
As we approached lunch time a new challenge arose: storm clouds ahead. Little bits of precipitation started and the temperature dropped significantly. We set up a tarp in the boughs of a tree and had lunch underneath it as soft hail (or round snow) began falling. Thunder sounded in the distance but thankfully moved off. The cold temperatures continued as we forged on. We got to a cattle tank for water and found another hiker hiding out in her tent waiting out the weather. We decided to try pushing on, and finally pitched our tents around 6pm, eating a rushed chilly supper and jumping into our tents for the night.
That’s right, hit 500 miles today!
Watch Day 35 of Oliver’s Arizona Trail series:
Day 36 – Trail Angels and Digestive Troubles
Thankfully, the cold night was as bad as it got. We were coming into the Mormon Lake area, and there were several front country options for camping, and Cruisy ground in between. Unfortunately, my digestive system decided it didn’t like changing water constantly, and it was a hard day of confusing messages and wondering if I was going to poop or just fart every time my guts wiggled. As we reached Dairy Springs Campground, myself and TC ran to the outhouses hoping they had been unlocked. A cooperative custodian granted our wish and I dosed myself that night with Imodium.
He didn’t know he was a trail angel until he was!
Watch Day 36 of Oliver’s Arizona Trail series:
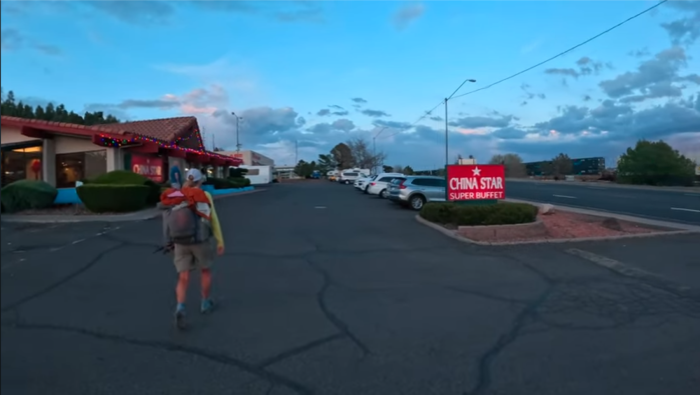
Day 37 – Record Miles and Chinese Buffet Dreams
Our initial plan today was going to do some big miles and set ourselves up for a good Near0 in Flagstaff, strolling into town on Day 38 after a handful of miles. But by lunchtime we were feeling good and had about 13 miles in the bag, so we agreed: let’s push for a record day and do 32 miles, and finish at the Chinese buffet! Considering our previous best was only 24 miles, this was a huge reach.
This is what selective logging looks like.
It was not without obstacles. I was disappointed that some selective logging dominated about 5 miles of trail, scarring the landscape. But worse, when we were about 10 miles out, the Cruisy, soft dirt trails were desecrated by hoofmarks: after the last rainstorm some horseback riders took their steeds out for a ride and their hooves turned some of the best, smoothest trail into a rough, broken mess. Our ankles took a huge beating for about 7 miles and I hope the AZTA makes clear to horse riders in the future not to use the trail after precipitation, to let the trail dry first.
But this little canyon on the edge of Flagstaff was gorgeous!
The trail down the blue line into Flagstaff was very pretty though. Especially the narrow canyons. We pushed out of those and onto some rising and falling pine knolls, and the sound of the distant freeway was heard through strange echoes that encouraged us. Sadly it wasn’t that close but when we finally reached the overpass, our sighs of relief were palpable. With our last reserves of energy we hiked up to Route 66 and into the Chinese restaurant just as the sun sank below the horizon at 7:10!
This article first appeared on The Trek on May 8, 2025.
So I ended my last post half way through the day… We didn’t stop at Roosevelt Lake but climbed right up into Four Peaks Wilderness, or at least the beginning of it.
Day 25 Continued – Climbing Into the Four Peaks Wilderness
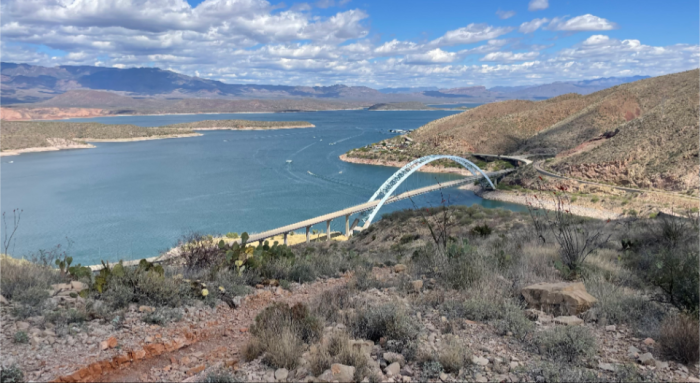
The bridge just kept getting smaller as we climbed (Photo taken by Jeff Ely)
After grabbing lunch and a few things in Lake Roosevelt, we road walked from the marina along the highway over a couple of bridges, and got a great view of the dam. The weather was sunny but not too hot, and with a full belly we started the notorious climb out of the bottom and up into the Four Peaks Wilderness.
For some reason I had a ton of energy and set a torrid pace up the climb. Great views of the dam and other lakes abounded, and we also observed a rainwater collector across the valley. Four Peaks loomed in the distance, taunting us. We pulled up at a trailhead 7 miles deep into the back country but because Take Charge had texted the Angel responsible for restocking the water, there was a cooler full of cold pop and beer waiting for us!
Watch Day 25 of Oliver’s Arizona Trail series:
Day 26 – The Big Climb Around Four Peaks
Me coping with my fear of heights along the path around Four Peaks (Photo by Jeff Ely)
We said goodbye to a couple of hikers (Olivier and Enduro) we had been seeing on and off since Superior and left early, feeling like we needed a big miles day to get us on track. What we didn’t realize was this would be the day with the single biggest total ascent of our entire hike so far! Battling with a staggeringly long Sidehill around Four Peaks, then chugging up and down an old access road only usable by heavily modded 4x4s or UTVs, we fought hard for 21 miles to camp at water.
Watch Day 26 of Oliver’s Arizona Trail series:
Day 27 – Down to Sunflower and a Tough Resupply
On the way down to Sunflower, someone managed to ditch 5 cars in the 60s. No roads anywhere…
Coming down out of Four Peaks to Sunflower, the trail got really enjoyable as it meandered alongside of a scenic wash. We had a brief rest under a shady tree, then made it to a lovely flowing creek with tadpoles and minnows flitting through the shallows and lovely pools which we used to do some laundry (downstream of where people would get water of course). Laundry in the creek was necessary because we were not planning to hitch up to Payson, but instead we were to meet Cheers’ parents for resupply at the highway. So things were going to get a lot dirtier before they got cleaner.
It was a little frustrating getting from the trail over to the pull off were the car was. And the pull off has zero shade or amenities so we baked in the sun while scarfing down Subway. Our resupply in order, we crossed the highway to pound our another 6 miles or so.
We found it fascinating how as soon as we crossed the highway the terrain, the character of the trail, the rocks and trees even seemed markedly different. We were somewhere new. Much shadier, much more comfortably meandering. We carried on to a water source at a nameless wash and set up camp. Unfortunately, one of our number got food poisoning that night from their sub, which made the evening a little difficult, but he felt much better in the morning.
Watch Day 27 of Oliver’s Arizona Trail series:
Day 28 – Into the Mazatzals
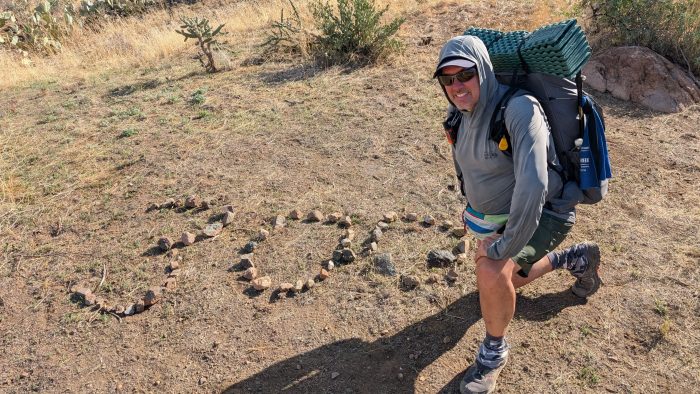
Also, we hit 400 miles today! Halfway!
I managed to rip my stuff sack for my 7 year old 1st edition XMid, so sad. I also accidentally left my short spool of Paracord at the camp and didn’t notice until I was 10 miles away at the next water. Rough start. But we cracked on and really enjoyed the superior trail design and beautiful landscapes in the Mazatzals. Certain sheltered sides of mountains sheltered us with looming trees, which was so great after weeks of desert. Water was becoming more plentiful. It truly elevated our experience.
We met a hiker called “Sinbad” at a water source, who has been hiking since mid March. He had lost over 30 lbs and was inspiring in his perseverance. We encouraged him to come camp with us, and surprise surprise he did make it after all as we would see him again the next morning as we pulled out. Hope he goes all the way.
Watch Day 28 of Oliver’s Arizona Trail series:
Day 29 – Snow on the Horizon
Can you see Mount Humphrey with its snow behind me?
Another awesome day, great trail, good energy, though all of us were beginning to flag since it was now day 8 since our last town day and we would not be in Pine until Day 30. The trail got rocky in sections, which took a toll on our feet and our speed. But our camping spot was just at a lovely overlook and our dinner was perhaps one of the more scenic. What also made the day special was glimpses of a snowy peak far to the north: Mount Humphrey already beckoning us onward. I hope the snow is gone by the time we get there.
Watch Day 29 of Oliver’s Arizona Trail series:
Day 30 – Crossing the East Verde Rivery
The land began to fold before us, as it made space for the East Verde River. Our ups and downs continued to be intermittently rocky which challenged us, and when we began our descent to the river, we found ourselves in almost full sunlight, pounding us like a hammer though the heat was not nearly as oppressive as the desert. We met another hiker on our way down (he was coming up) and had decided to wait out the sun under some shady bushes. We pressed on hoping for respite at the river.
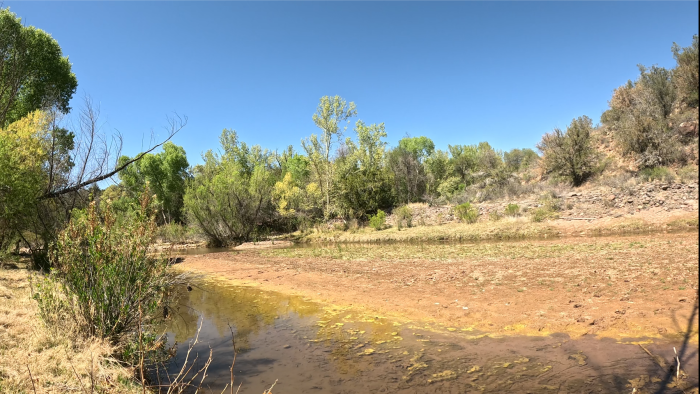
The East Verde River was much prettier in my mind…
The river was… Disappointing. The deep spot was knee deep and muddy bottom, and we forded there anyway because just wanted to cool our feet, despite there being some easy rocks to hope upstream. We met “Sunshine” from Germany, and she went for a swim as much as she could while we filtered water out of two fast flowing tributary streams, clean and pure. And then it was onward we went, knowing Pine was only a few miles away.
Unfortunately the folds grew more challenging, causing us to ascend and descend rocky gravelly trails. One sustained climb to a plateau followed an old road and it was steep and tough. But we found cruisy flat ground at the top and made good distance for a while. Our camp spot that night had a wonderful view though.
Watch Day 30 of Oliver’s Arizona Trail series:
Day 31 – Finally Reaching Pine
Up bright and early to push into Pine. We were just a hundred yards uphill from a nice water trough spring so we watered up there and set out to make miles.
The hike into Pine was actually quite nice with good trail and great weather. We tried hitching into town after the cost and wait time for Lyft was ruled out (don’t waste your time). Our VRBO was very nice but a little out of the way … That night we walked 35 minutes into the County Inn restaurant, home of a wood fired pizza of some reputation. A section hiker named Chipper (from England) joined us for the meal.
REALLY good pizza, but don’t order the old standbys. Try their specialties!
This article first appeared on The Trek on May 23, 2025.
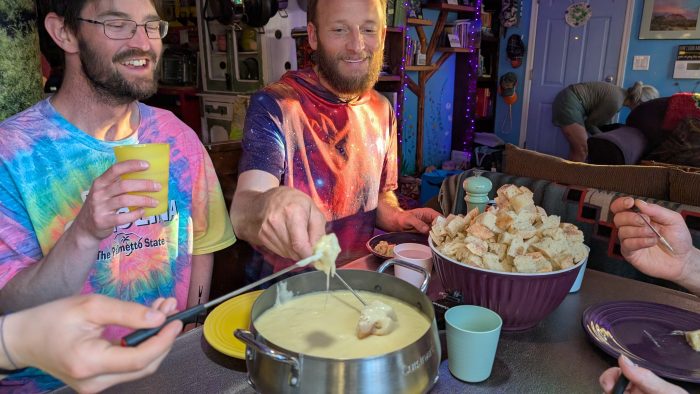
Thanks for following along! When last I posted (Day 21), we had just rolled into Superior for a Zero. My hiking tramily drove off to hang with family in Apache Junction while I stayed at MJ’s in Superior, an experience I was deeply looking forward to. Firstly because MJ is an incredible person who bends over backwards for hikers in ways that are just astonishing. Secondly because it is a whole different experience to hang with hikers on a zero, to hear the life stories, to experience their personalities when not driven by the trail, to talk shop, collect Intel, and even give back a little.
Day 22 – Comfort and Camaraderie at MJ’s
My first night at MJ’s (day 21) featured a Swiss doctor cooking up an authentic Gruyere fondue, which I ate entirely too much of. The second day I teamed up with him to become “The Two Olivers” and we cooked up a sausage and risotto feast. I also opened up my own resupply box which contained my duffle and five dehydrated meals I had brought with me from home to supplement my resupply (they are quite scarce on trail outside of Tucson, Phoenix and Flagstaff) and a new pair of shoes!
Gruyere fondue party!
The shoes were a huge deal. I started the trail with the Saucony Excursions I had worn on my section hike of the AZT in spring 24. They had been fine back then when they were new (and I was doing 10-15 miles a day). But this time, putting 15 to 20 miles up and having already been broken down a bit, they had been making hamburger of my feet, squashing my pinkies and just not stopping any of the punishment the rocky sky islands had been dishing.
My new shoes were a pair of Altra Lone Peak 6’s. The spacious toe box and perfect fit, plus the padded forefoot completely transformed the trail for my feet. Ah, I now know the joys of new shoes on trail!
I went a little heavy on the resupply, winding up with a little more than I needed, but sometimes that just happens. I also was asked by MJ to take her car and pick up hikers coming into Picketpost, which I really enjoyed, being able to assist her operation even if it cut into my R&R time. I also shuttled a sick hiker into Apache Junction for some extra care. Never did hear how she turned out…
Watch Day 22 of Oliver’s Arizona Trail series:
Day 23 – Back into the Superstitions
The wash by the Rogers Spring trailhead. Reasonably certain we were not going to be swept away by a flash flood.
Back on trail! My tramily returned and picked me up super early and we set out from Picketpost north into the Superstition Wilderness at 6am. I began saying goodbye to the delights of desert heat and cacti. We encountered the corpse of a fox on trail, and wondered if this had been one of the reported rabid foxes some people had encountered earlier in the year. We pushed up to a wash and bedded down for the night.
Watch Day 23 of Oliver’s Arizona Trail series:
Day 24 – The Reavis Ranch Storm
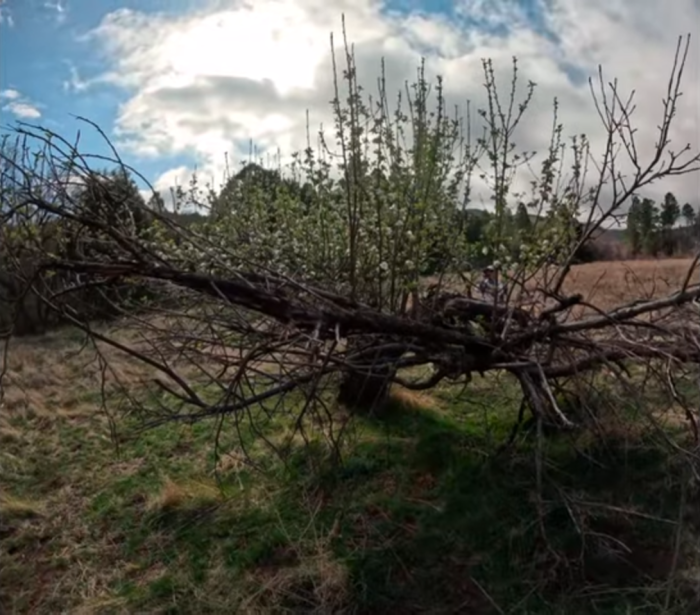
An overgrown apple tree that survived the fire. Love to try one of its apples in the fall!
You would think by day 24 my trail legs would be in. In the morning, absolutely. By close to midday we had reached the Reavis Ranch area which was a dream to saunter through. I’d like to come back in the fall to try some of the remaining apples from trees that were not destroyed in the fire that wiped out the ranch. But by afternoon, more punishing declines and inclines over rocky terrain had me tapped right out. We camped on a lower saddle hoping the winds wouldn’t be that bad. The forecast was mixed, but we had no idea what was to come. Because of my experience last year on a Ridgeline in a storm, I put every peg I had into the hard soil and pitched my tent parallel to the winds and next to a tank, hoping shelter from one side at least would give my tent a fighting chance.
I pitched parallel to the tank hoping for shelter from one side. Amazingly the wind kept alternating hitting from either end of the tank. But because my narrow ends were into the wind she stayed up!
At 8pm the fight began. A windstorm and rain blew in and began battering all our tents. I saw lights come on as some of my fellow campers scrambled for rocks to pile on their stakes. I thanked God that the winds were hitting the narrow ends of my tent instead of broadside but still despite my low pitch dust was being thrown in and coated my hair and my quilt. The pounding continued until 10pm when finally the wind and rain subsided, and with my tent still standing I finally drifted off to sleep.
Watch Day 24 of Oliver’s Arizona Trail series:
Day 25 – Prayer, Patterns, and a Change of Pace
When I got up in the morning I inspected my tent. One groundhog stake had worked its way to be 3/4 of the way out. I was that close to having a tent failure in that storm. Prayer works, friends! We would later learn that storm hammered a group on a higher ridge with hail and put 8 inches of snow down from Pine north to Flagstaff.
I came to a realization on trail that there was definitely a pattern to each day. The morning was cool and I had tons of energy (especially since I had learned how to hydrate myself properly on trail: my method was to always have at least 3L of water on me at all times, and to drink big every time I felt thirsty – 250mls at a time). Lunch would rejuvenate for a couple hours, but every afternoon from 2:30 on to when we stopped I would feel rough, just gutting it out till we camped. Now, it had changed for the better with my new shoes … I wasn’t limping into camp anymore, and when we took breaks I didn’t have to limo for 5 minutes until the compression of walking reduced swelling in my painful toes.
Cruising downhill to the Lake in the distance!
But this day the pattern changed. Coming down to Lake Roosevelt, it put a big disruption in the pattern. We reached the marina by 1030, and we lounged around the hiker shack where donated resupply and a charging station were there for our convenience. Other hikers dried their wet nylon tents (I love my Durston XMid made of silpoly, it doesn’t hold water!) and by 1130 the diner opened, so we had big burgers for lunch. But the plan was never to stay so we pushed on after lunch to ascend into the Four Peaks Wilderness! I’ll leave that for my next update!
This article first appeared on The Trek on April 25, 2025.
This poor Canadian knew it might get hot, but there really was no way to prepare for it with snow on the ground. Day 1 on Miller Peak was warm, but nothing like this stretch! Yet the rewards were tremendous.
Day 14: Red Ridge Reroute and a Hard Lesson in Heat
The view down Red Ridge. See where it ends on the left? From the bottom we had to climb back up the ridge on the right.
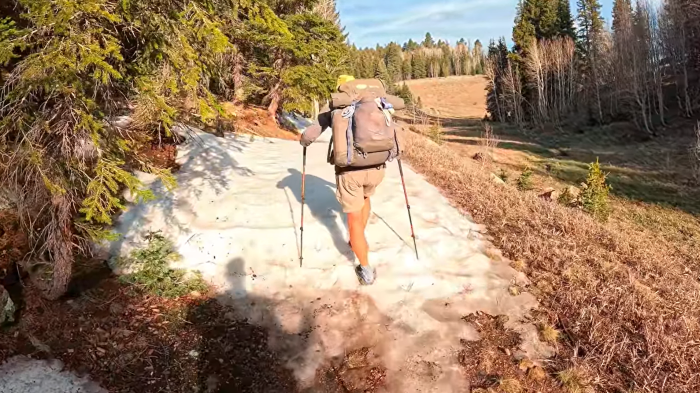
We set out to descend Mount Lemmon. After a stiff climb, we anticipated a leisurely saunter downhill all day into Oracle. It was a nice temperature for Summerhaven, but that in retrospect should have been our warning: it would only get hotter.
First shock: the AZT had been rerouted from Oracle Ridge to Red Ridge. We didn’t really think about what that meant until we’re on it. First, it lengthened the road walk to the trailhead, but that was minor. Then it sent us downhill very rapidly through an old burn, which increased our exposure to the sun early and started taxing our hamstrings (and Cheers’ knees). The reward was a nice stream of flowing water at the bottom and a bit of history with an old mining camp we passed through.
The punishment was we had to climb back up to Oracle Ridge, nearly undoing all the descent.
The rest of the day became a slog, as we tried to conserve water and make it to a cattle tank at t end of the ridge. The sun was descending rapidly, and we began to grasp at ways to shorten the day: Hi Jinks Ranch had water but was unavailable for us to stay as the owner was out of town. We managed to stumble down to American Flag Trailhead and called a local trail angel for a lift to El Rancho Robles, which turned out to be a solid choice. One massive burrito later, we went to sleep in a bed for the second consecutive night full but tired.
Watch Day 14 of Oliver’s Arizona Trail series:
Day 15: Through Oracle State Park
We still had all of Oracle State Park to do, and our initial instinct was to just take it easy after two punishing days in a row (well, more like 6, of we include everything back to Colossal Cave, our easy day after the Tucson Zero). But we ended up marching in hot sun through the park to the underpass, up to Tiger Mine trailhead, then out to the first wash for the night. We camped with an experienced hiker there named Mud, from Hawaii.
Watch Day 15 of Oliver’s Arizona Trail series:
Day 16: Siesta Strategy and the Ant Invasion
Sunset after a hot day north of Oracle
Today was all about going from water source to water source. We knew our options would be limited and the weather would be hot so we decided to make sure when we stopped we could drink as much as we needed to rehydrate. Our first goal was Mountain View Tank which we made by 11am. We elected to siesta there and wait out the hottest part of the day. The shade of the tank was better than the feeble shade provided by desert shrubs.
We got going again around 3pm and hiked down to Beehive Well, which was set in a sheltered bowl. Dusk was falling fast, but I had a heck of a time siting my tent as ant nests were everywhere. About a hundred ants came over to investigate my camp stove, so as soon as I finished cooking I broke my cardinal rule and are inside my tent to escape the ants.
Watch Day 16 of Oliver’s Arizona Trail series:
Day 17: Night Hiking to the Wildlife Tank
We set out as early as we could, planning to get in some good miles before the heat and knowing we would siesta again to avoid the worst of it. We made it to Freeman Road water collector before 10, and settled in. Luckily the ground was comfortable around the collector and the bees restricted their patrols to the spigot itself, and were calm enough when we filled our bladders. We were joined by GoPro and Deadpool for most of the afternoon, who regaled us with stories of the joys of night hiking. We knew we would have to do a little because it would be a 10 mile push to the wildlife tank and leaving at 4 would mean an arrival 3 hours after sunset.
That is exactly what happened. The moon was almost full, but I have no idea how GoPro was able to see so well without a headlamp. I definitely needed it. Even with it I was stepping on rocks and stumbling around. And we felt like we missed out on the beautiful terrain: we knew we climbed through a pretty canyon but never saw it because of the darkness. We reached the tank and went straight to bed, planning to fill up on water in the morning.
Watch Day 17 of Oliver’s Arizona Trail series:
Day 18: Tortilla Mountains and True Trail Magic
Running the sun down once again to beat the heat
The wildlife tank was interesting to see and explore in the daylight. Early in the morning one night hiker cowboy camped nearby and another went by us, so for those who wanted to do big miles on the heat they were becoming night owls. But we did not like it and resigned to finding other ways to cover the hot miles.
We descended into some arroyos and found some good water from a spring that was dripping into a blue barrel with a spigot before filling a cow trough. A young guy named Parakeet showed up there, he had an interesting setup and seemed a little inexperienced but he had enough water.
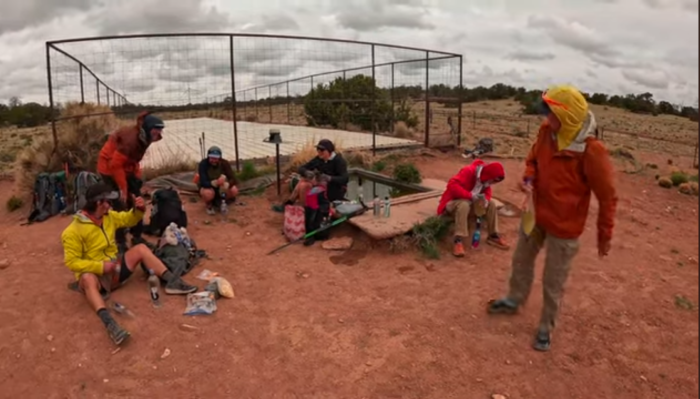
Our day got tougher as we had to ascend ” the big hill” and traverse the Tortilla Mountains. This would prove to be the hottest day of this stretch, and the most shadeless. We tried to have lunch in the shade of a Palo Verde but it was very little help. My appetite disappeared and I developed rather explosive um… Rear issues. All I wanted was water and electrolytes. Coming down from the mountains we just focused on Florence Kelvin and the water Cache there. My thermometer hit 104 degrees. Our water in our bottles was so hot it tasted like hot shower water. When I got to the cache I just laid out my foam and sipped the slightly cooler water from the cache. My friends caught up and we were so spent we decided to forego the 2 more miles to Gila Trailhead. Just then the first true trail magic of our journey happened. A head popped out over the bank and said “Hey you guys hiking the AZT?”
“Yeah…”
“Want a cold beverage?”
James (center-right) is a true trail angel. If you hike through Kearney, show him the love.
The look on our faces could never have been replicated. A guy named James gave us cold drinks and took us to Buzzy’s for burgers, then dropped us at Jeff and Que’s for the night. Jeff gifted me with a wooden AZT “challenge coin” which is amazing. Most people don’t understand, but as a member of the military, I know how special this is and will display it with pride when I get back to work.
Watch Day 18 of Oliver’s Arizona Trail series:
Day 19: Along the Gila River
Siesta by the Gila River
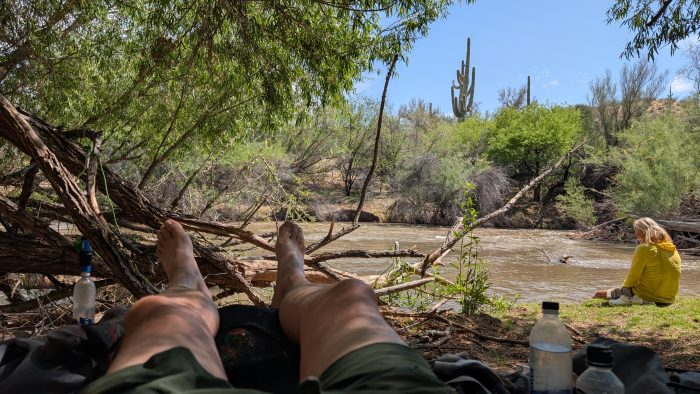
No rest for the wicked: we jumped back on trail early with help from James again, and attacked the hottest passage on the AZT: the Gila River. Stunning views were on display all day as we wandered up and down the hillsides above the Gila. The lush valley contrasted sharply with the desert sometimes only separated by feet. Many rumours have been floated this year about Norovirus from the river, but we drank from it (through our Sawyers), bathed our feet in it, and rinsed our clothes in it and suffered no ill effects. A rattlesnake sauntered by one of our watering points on the river but we didn’t question him so he had nothing to say to us. At another water stop a steer strolled up, had a drink, then disappeared whilst we siesta’ed. We finally set up camp on the edge of the river just past the low point of the AZT, so we could stage for the hot, dry climb up out of the valley to Superior the next day.
Watch Day 19 of Oliver’s Arizona Trail series:
Day 20: Climbing Toward Superior
Our day started out strangely: with a voice from across the river trying to figure out if it was safe to cross. The river was extremely muddy so we were concerned it was not safe, but the hiker ultimately resolved to try since backtracking would have added 24 miles to get to where we were. Luckily, the river was only thigh deep and we left them secure and ready for a nap since they had stayed up all night.
We all had lots of energy this morning, especially myself as the heat had subsided somewhat and I recovered my appetite the night before. We covered the first five miles of ascent easily then slowed down to admire the most stunning terrain (in our group’s opinion) on the trail so far. The sculpted rock, dramatic cliffs, perfect morning light all combined to take our breath away as we went.
Simply breathtaking climb up to Superior (the climb and the views)
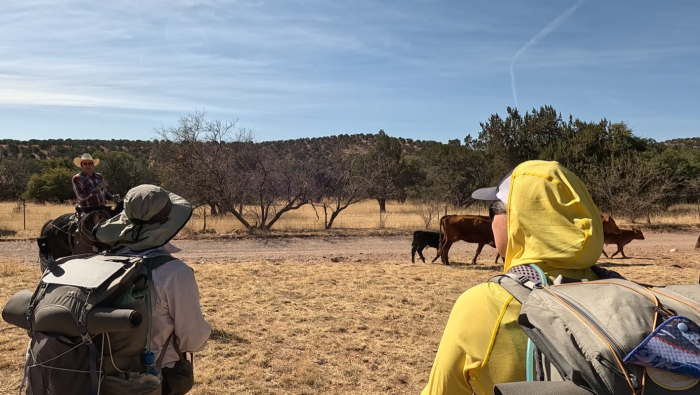
Our goal was to reach the water collector at mile 10 of our day but we reached it around 1130 so we took a few hours to avoid the hot sun and considered our next move. We knew we were going to zero when we reached Superior but we thought rather than push and get into Superior late, then having to do everything in one day, to camp 5 or 6 miles out and then have an easy morning in, gaining an extra afternoon of rest. This turned out to be a great plan and we got to see more Gila monsters and several new varieties of cattle on the way to camp. A young hiker named Sleeves joined us that evening and we went to bed anticipating our rest (and the new shoes that awaited me in Superior).
Watch Day 20 of Oliver’s Arizona Trail series:
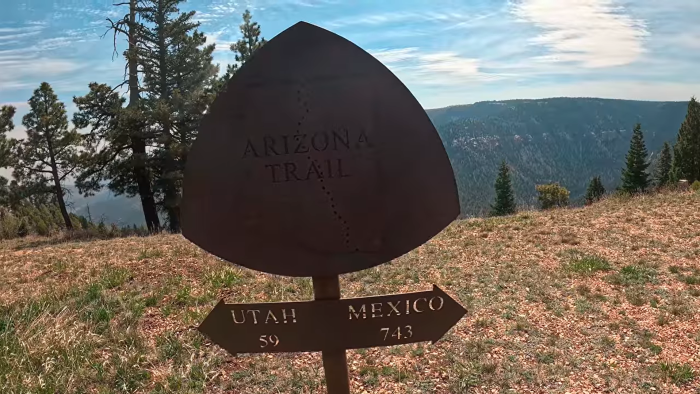
Day 21: The 300-Mile Mark and a Superior Zero
Hit the magic 300th mile just south of Picketpost!
Went exactly according to plan. An easy saunter into Picketpost Trailhead. Met my hiking partners’ parents. Brunch at Jalapeno’s in Superior. Dropping me off at MJ’s (the Trail Angel of the Year last year for good reason!). A shower, a resupply, helping MJ by driving the pickup car for some other hikers, then enjoying a Swiss Fondue feast prepared by a hiker from Switzerland for the 11 of us staying with MJ! What a finish to this brilliant, yet challenging section!
This article first appeared on The Trek on April 16, 2025.
Day 8: Zero in Tucson and Resupply
We did take a Zero in Tucson and it was well used. We hooked in with an old friend of my tramily: Cheers and Take Charge, who drove us to REI and to a Walmart to resupply. At a ton of pizza and enjoyed a well deserved break.
Watch Day 8 of Oliver’s Arizona Trail series:
Day 9: Colossal Caves and Trail Logistics
Here is where things start going off script. We Ubered back to Sahuarita Trailhead and set off with the goal of Colossal Caves. Unfortunately because of our late start, it was closing when we got there which might have been irrelevant except my missing pants were shipped here by Mary at TerraSol! I ran up and caught staff doing their closing tasks, and they blessed me with a free cold drink as well as getting my package even though they were already closed.
We decided to stop there even though it was just a 12 mile day because Rincon Creek was dry and there was no other water source to stage from to get up to Grass Shack, our intended camp in Saguaro National Park on the way up Mica Mountain. Colossal is a nice little campsite and convenient to the trail.
Watch Day 9 of Oliver’s Arizona Trail series:
Day 10: Mica Mountain Assault and Trail Celebrities
Our assault on Mica began. It was touch and go with water sources, many I had accessed on my section hike last year were dry. But we made it to Grass Shack and then experienced some trail celebrities who joined us in the evening: Jolly, Jabba (The REAL Hiking Viking) and CuckooBird. They were some of the most extroverted people I have ever encountered and even had some sage advice for me: “Always be kind to your future self.”
Watch Day 10 of Oliver’s Arizona Trail series:
Day 11: Mica Summit and Snowy Descent
We expected this to be a big day and it was: the rest of the elevation gain to the high point of the trail on Mica, then a rapid descent down to Reddington Road. The intermittent light showers from Day 10 were snow on Mica and the temps were COLD at Manning camp! We needed some water but didn’t realize there is a source just down the hill below their fenced off water area. So Cheers hiked back down the mountain a half mile or so to a small creek we spotted as we climbed and Take Charge and I tried to stay warm. I finally fished out my quilt and wrapped it around me. Once we got underway there was patchy snow an inch deep for the rest of the climb and then down to the park boundary. After reaching Reddington and hearing side by sides ripping around we pushed another half mile up the trail for a more peaceful sleep.
Watch Day 11 of Oliver’s Arizona Trail series:
Day 12: Hutch’s Pool and Beastly Climb
Morning sunrise in a cow pasture north of Reddington Road
After such a huge day you’d think we would take a recovery day! We intended to but had no idea what would be in store trying to get all the way to Hutch’s Pool for camp. We knew it would be 20 miles but for some reason we thought it would be easier than Mica. Nope! We had a beastly climb up to a saddle overlooking Molino Basin and then a big descent. Lunch at Molino, then another huge push up, watching people speed up the Catalina Highway. Massive descent down to Sycamore Reservoir (I’m not a huge fan of steep dropoffs and the switchbacks down had me quite uncomfortable). The actual bottom was lovely walking though, and we for the most part enjoyed the rest of the approach to Hutch’s Pool. Wish I had arrived a little earlier, it was too shaded at 5:30 for me to go for my planned swim. So much for our recovery day before Mount Lemmon.
Watch Day 12 of Oliver’s Arizona Trail series:
Day 13: Romero Pass and Arrival in Summerhaven
Romero Pass looms above me…
We got out of camp early, rejoicing at how amazing Hutch’s Pool was to camp at. And being Day 13, I felt like my trail legs were coming in and we blazed up to Romero Pass. But the joke was on me. The terrain got pumishingly steep after Romero and I was hurting. We got to a higher point where it finally leveled out for lunch, getting very low on water. Found a couple puddles and squeezed out 2 liters, hoping that would be enough to get to Summerhaven. But fortunately, after those puddles we encountered more, larger puddles and then Lemmon Creek so lots of sources.
I loved that little tree growing out of a rock. A symbol of resilience and perseverance.
At lunch we realized we needed to be in Summerhaven before 3pm because my tramily had resupply boxes there, and I was supposed to receive the magic ring of coupling, to finally link my water bottles to my Sawyer squeeze. So we tried to amp up the speed but the terrain mocked us with repeated steep inclines over large rocks. It took the wind out of us and we resigned ourselves to not making it in time, just slowing down to not kill ourselves. When we hit the lovely tree tunnel we began to run into dayhikers and knew we were close. We got to the parking lot at 2:50 by some miracle, and hitched a ride to the post office arriving with 2 minutes to spare!
So now we are holed up in Summerhaven in a cabin, planning our next 5 days into Kearney. Did I mention my tramily is so awesome, I am 2 days ahead of schedule? So happy! Tired, but happy.
This aricle first appeared on The Trek on April 7, 2025.
Continuing North from Patagonia
Catching some views on a shady break
Day 5: El Pilar Tank and Scenic Camp
Patagonia was brilliant, but it felt good to get back on trail the next day. We caught a lift up to the trailhead on 82 and stepped off north.
The trail was much nicer a starting out than the southern segments, with good grade and following contours for nice easy climbs. The contouring got vigorous for the first half of the day as we zigzagged along a series of hills. At the top of that we went in search of water at CCC Lakes, but it wasn’t easy. We had to hike up an unmarked hillside, then wander around until we spotted an old road down to the right which finally brought two small reservoirs into view, tucked away. They looked well used by cattle but smelled clean and filtered almost clear.
El Pilar was peak for a water source/camp.The pool at the base of El Pilar was the best quality.
Our camp destination was El Pilar Tank which turned out really well: the two rock pillars standing watch over excellent water springing from the cliff were dramatic. Above the spring was a flat area of soft soil, easy pitching and tons of room to share with other hikers. Because all this was down in a bowl, we were sheltered from wind and shaded.
Watch Day 5 of Oliver’s Arizona Trail series:
Day 6: Trail Names, Cowboys, and Kentucky Camp
At this point we began to be very careful about water sources, and planning our where we could get it. I also got my trail name! So I have been dubbed “Chuckles”. Something about *mumble mumble positivity something…*
The Dude on horseback was actually a passage steward for the AZT!
We reached Apache Springs Trailhead and lo and behold the same guy who gave us trail magic near Parker Lake was here too! His son is solo hiking the AZT and he is supporting him. We chatted for a bit more and then watched as a quintessential Arizonan Cowboy rode by in chaps, on his horse, with two dogs moving about 20 head up to a range. What a moment.
If you’re coming through, stop at Kentucky Camp. Worth it. Free oranges for thruhikers!
We stopped for lunch at Kentucky Camp, and enjoyed the many historic signs leading up to it explaining the hydrological processes used to mine gold in the area at the turn of the 20th Century. The camp itself was very welcoming to hikers, offering pit toilets, sheltered furniture on a covered veranda, garbage, and tap water. Even a bucket of free oranges! They also have antique houses as BnBs if one was poshly inclined.
The fateful night…
We pushed up to Box Canyon trailhead, where we topped up on water and looked for a campsite. The stuff closest to the cache weren’t very hospitable, so we kept going another 0.7 miles to a Ridgeline. Pitched up and tried to sleep but at 1am the wind picked up hard and rattled my tent until morning.
Watch Day 6 of Oliver’s Arizona Trail series:
Day 7: Long Desert Push to Sahuarita Trailhead
On half a night’s rest we set out for our longest push yet: 20 miles plus to Sahuarita Trailhead. Water was even more scarce, we tried to rely on caches because the cattle ponds were low and actively used by cattle.
The brutal winds continued all day, slamming us around on the trail. On the bright side they were cool winds for most of the day, so that was welcome. But they never quit, gusts smacking us and steady blowing the rest of the time.
The trail was downhill most of the day, and after lunch as we got down onto flatter terrain and we began to see houses dotting hillsides, indicating we were entering suburbia, the trail began to get… Illogical. It wound back and forth in silly S curves, doubling back on itself for no obvious reason. At one point I nearly walked into someone with their cathole who thought they had gone off trail for privacy but really were only a few feet off the next loop.
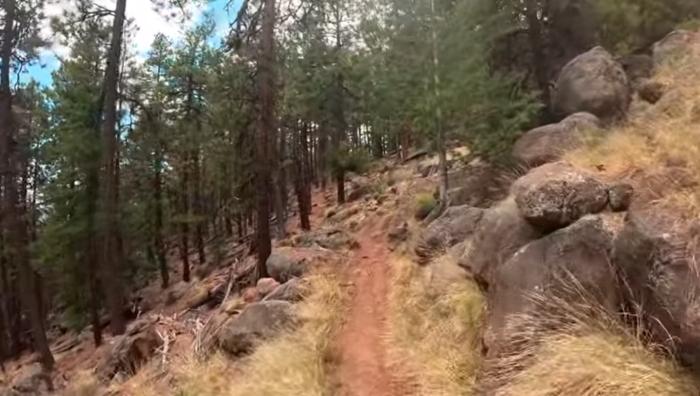
Quintessential AZT
In this same section we made the transition to full desert. Few trees left, and multiple varieties of cacti. The Ocotillos were in bloom which were very pretty. But we kept pounding the miles, knowing we would not see more water until Sahuarita Trailhead and the cache. We thought this would set us up for an easy 5 miles on day 8 and an Uber ride from Gabe Zimmerman trailhead.
But once we finally reached the trailhead at Sahuarita at 5pm, the winds were unabated and we realized with the flattening of terrain there would be no shelter from them or from the noise of traffic from the roads around. We were spent, and decided to call an Uber from here, into a Zero in Tucson early. What this will do to our plan is make our day on Thursday about 12 miles from Sahuarita to Colossal Caves, where there is a nice camp at the base of the hill. Then we will punch up to Grass Shack in Saguaro National Park on Friday. Should be a good plan. We will see if the plan holds up to reality!


